Back to Resources
Video Walkthrough (Team Module)
If you have a walkthrough video, drop it here. It’s most helpful to show
invites, sharing client access, and manager assignment.
 Coming soon...
HOW TO USE BOOKWITS
TEAM
BEGINNER
Team Module Guide
The Team module is where you invite staff, assign roles, control which clients they can access, and manage who is responsible for each client.
How to Use Bookwits
8 min read
What the Team module is for (plain English)
Use Team to:
- Invite new team members to your workspace
- Assign roles (Admin vs Member)
- Control access to client data (clients, companies, personal taxes, documents, and related work)
- Remove team members (instantly revokes access)
- Quickly see who has access to what and who owns responsibility
Think of Team as your permission controls + “who owns this client?”
dashboard.
Roles and access levels
Bookwits supports two core access types:
Admin
Full platform access.
Includes access to the Team module and
all clients (and everything related).
Member
Restricted access.
Can access only the clients you share with them. Shared access includes:
- Client profile
- Companies
- Personal Taxes
- Documents
- All related data/actions tied to those clients
Make someone Admin only if they truly need full visibility into the entire
workspace.
Add a new team member (invite)
Steps
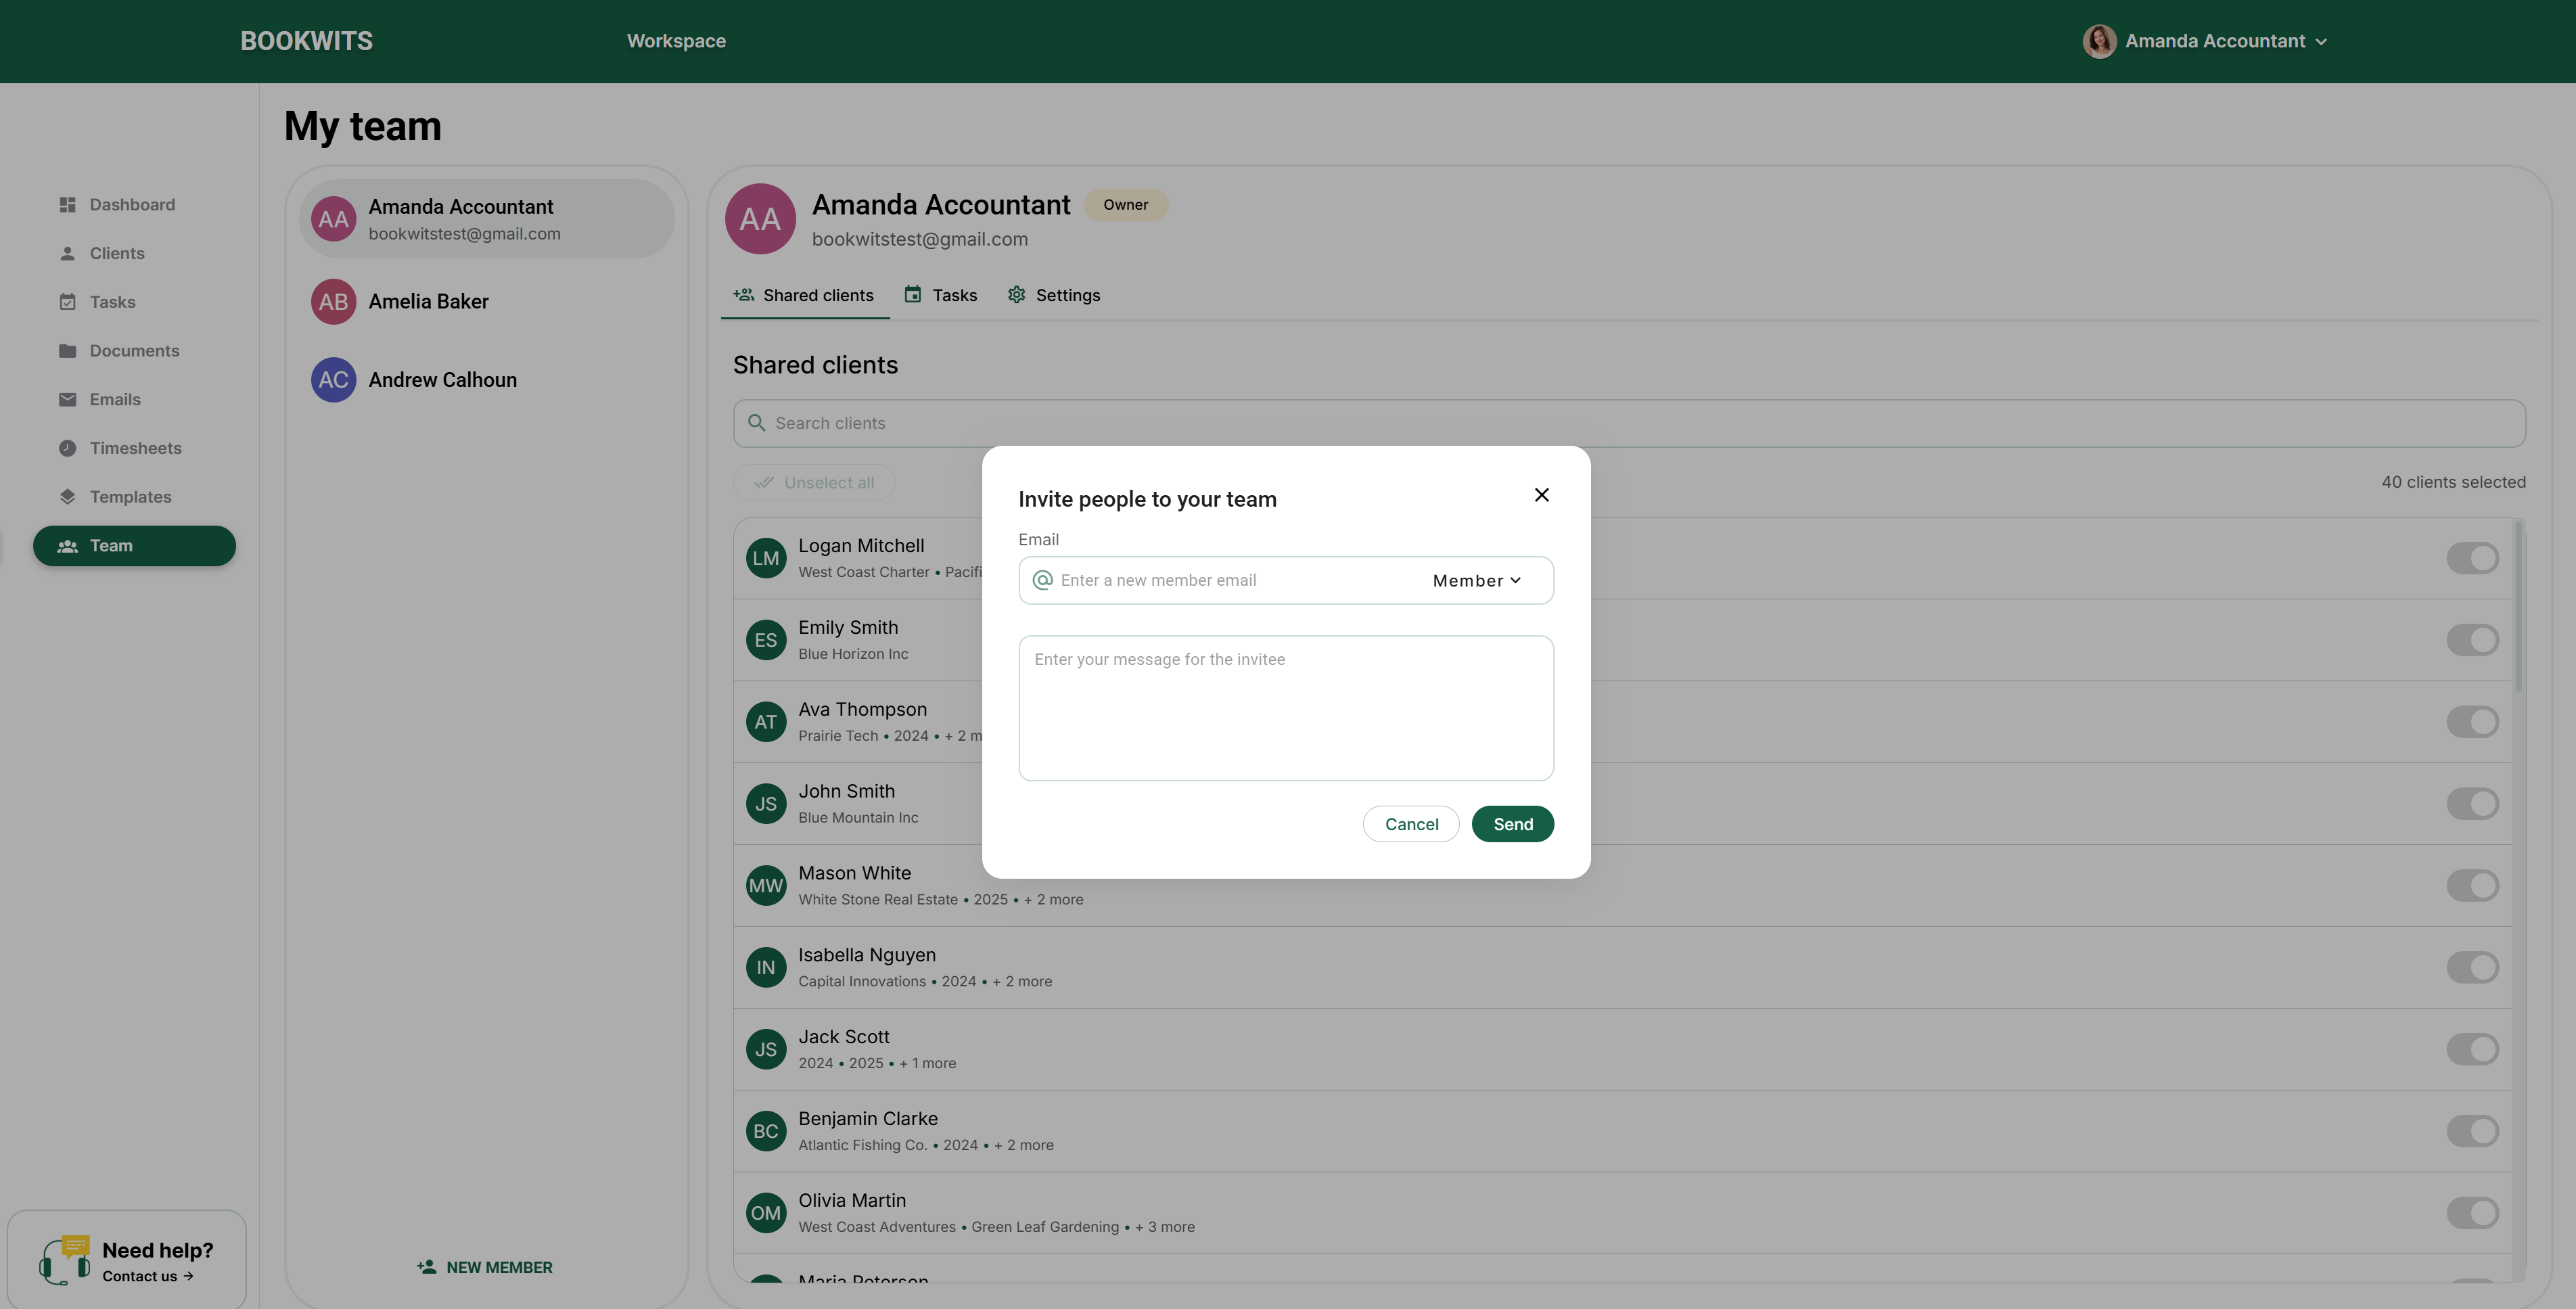
- Go to Team
- Click + New Member
- Enter their email
- Choose access level: Admin (full) or Member (shared clients only)
- Send invite
What happens next
- They receive an email invitation
- They must register on Bookwits to join your workspace
- After joining, they’ll have access based on role + client sharing
View your team (list + basic info)
In Team, you can see all members and their basics:
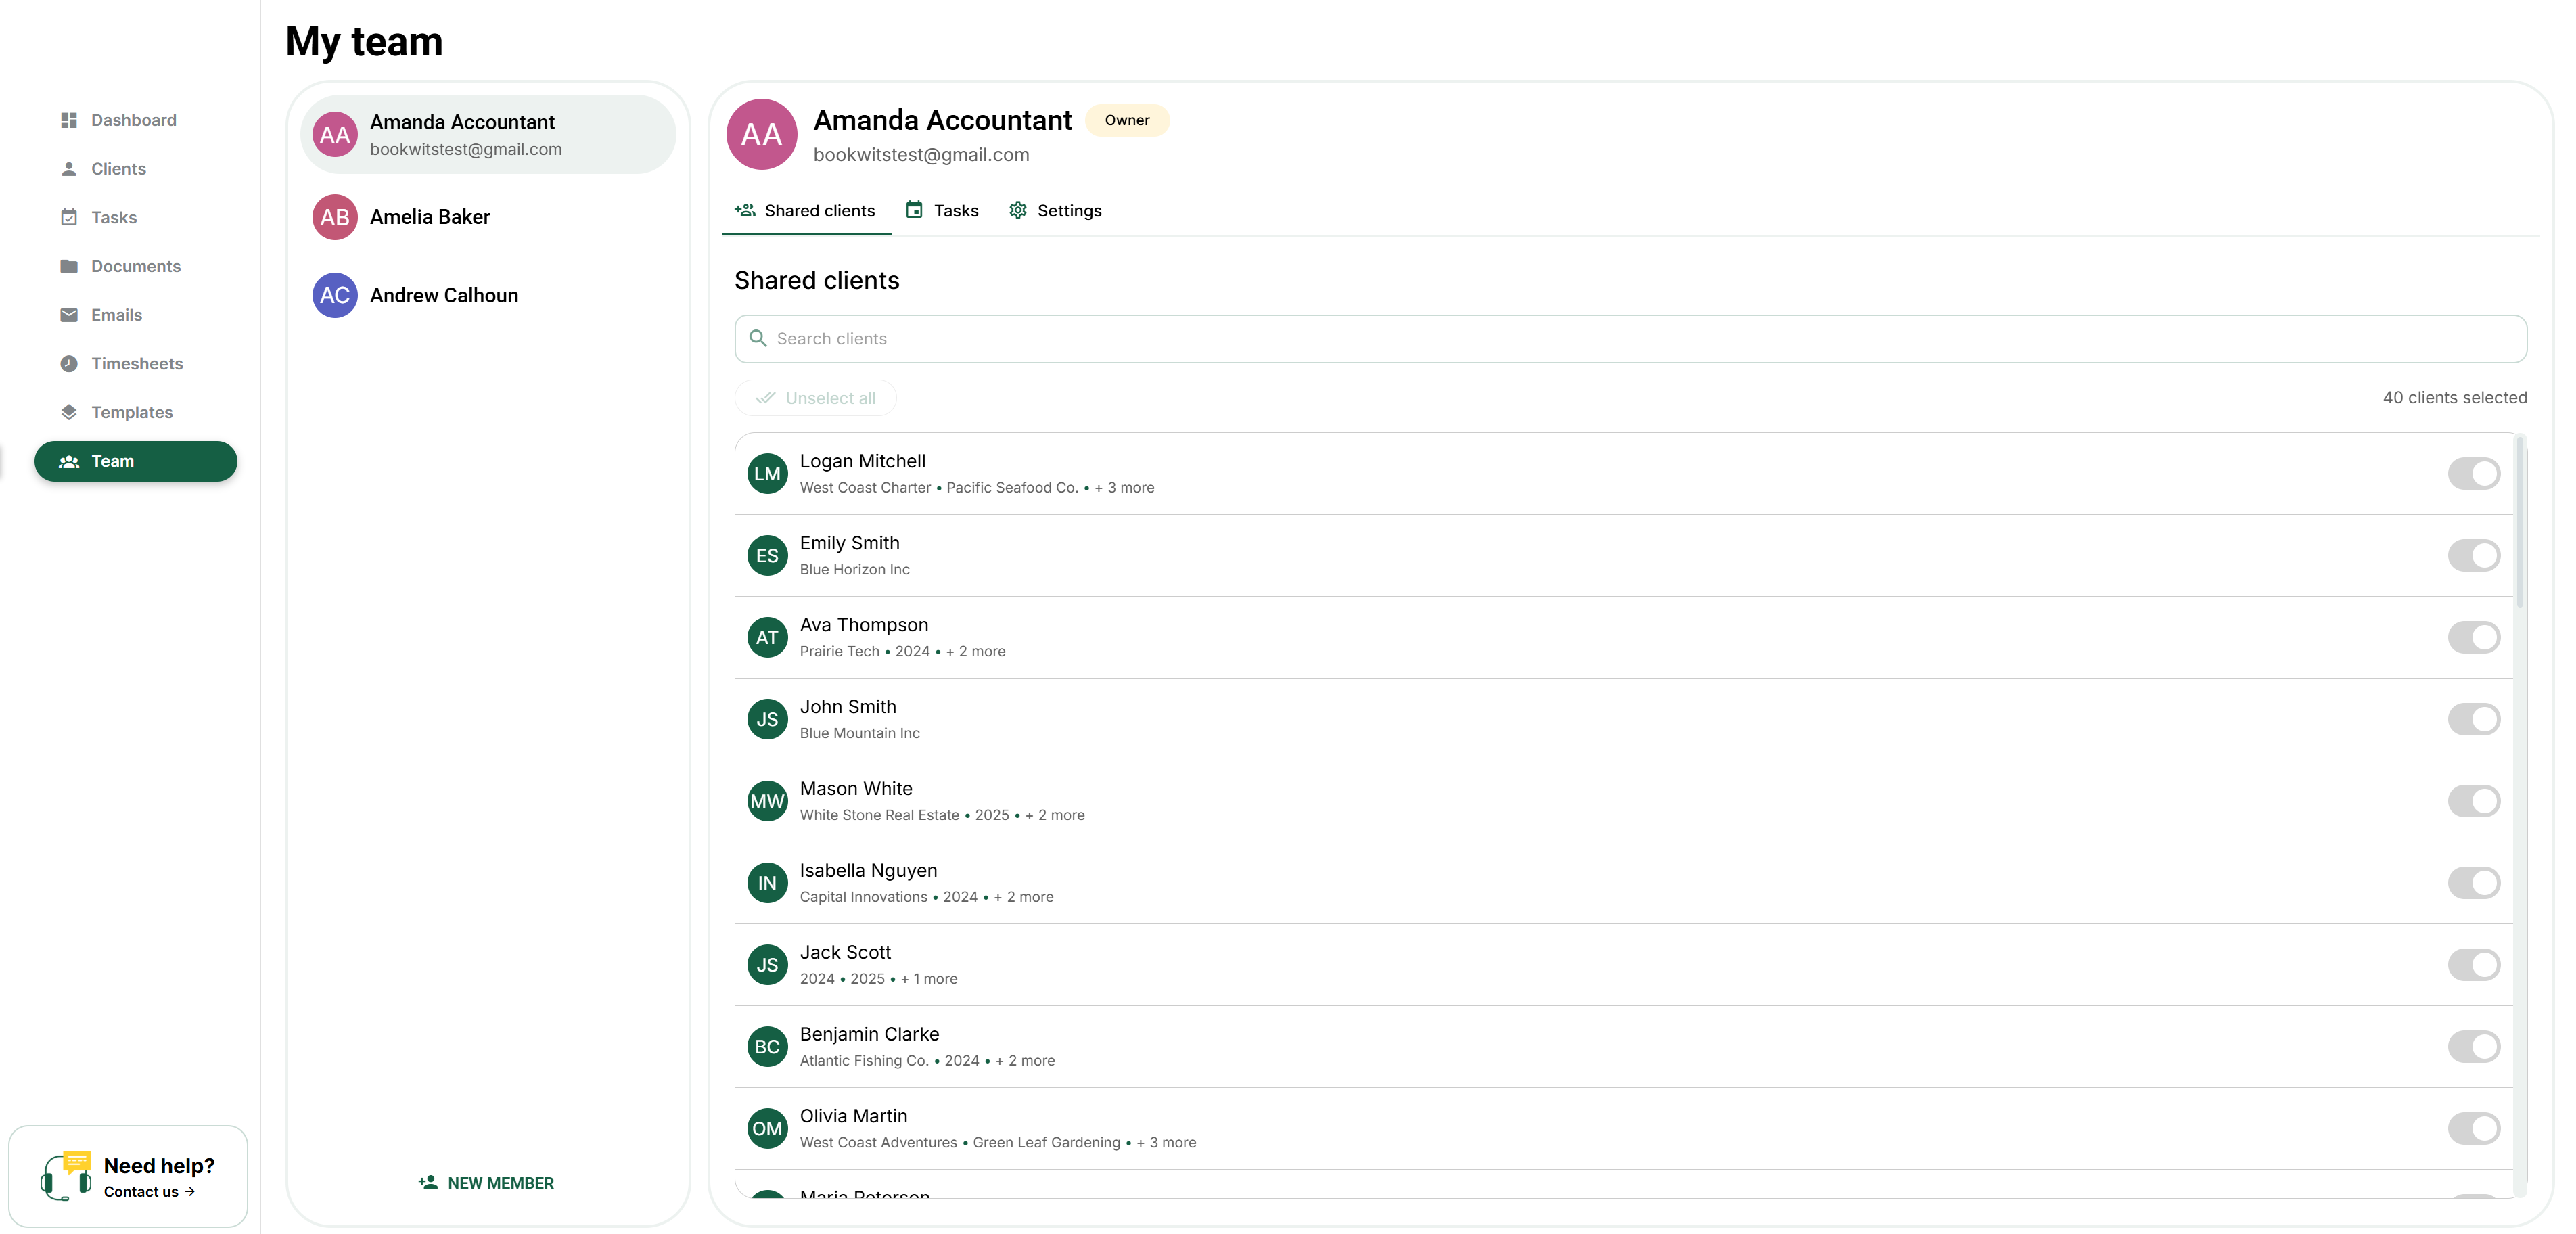
- Initials/avatar
- Name
- Role/access type (Owner/Admin/Member)
Why this matters
It’s the fastest way to confirm who is in the workspace and what level of
access they have.
Share clients with a team member (access control)
For Members, access is controlled by the clients
you share with them.
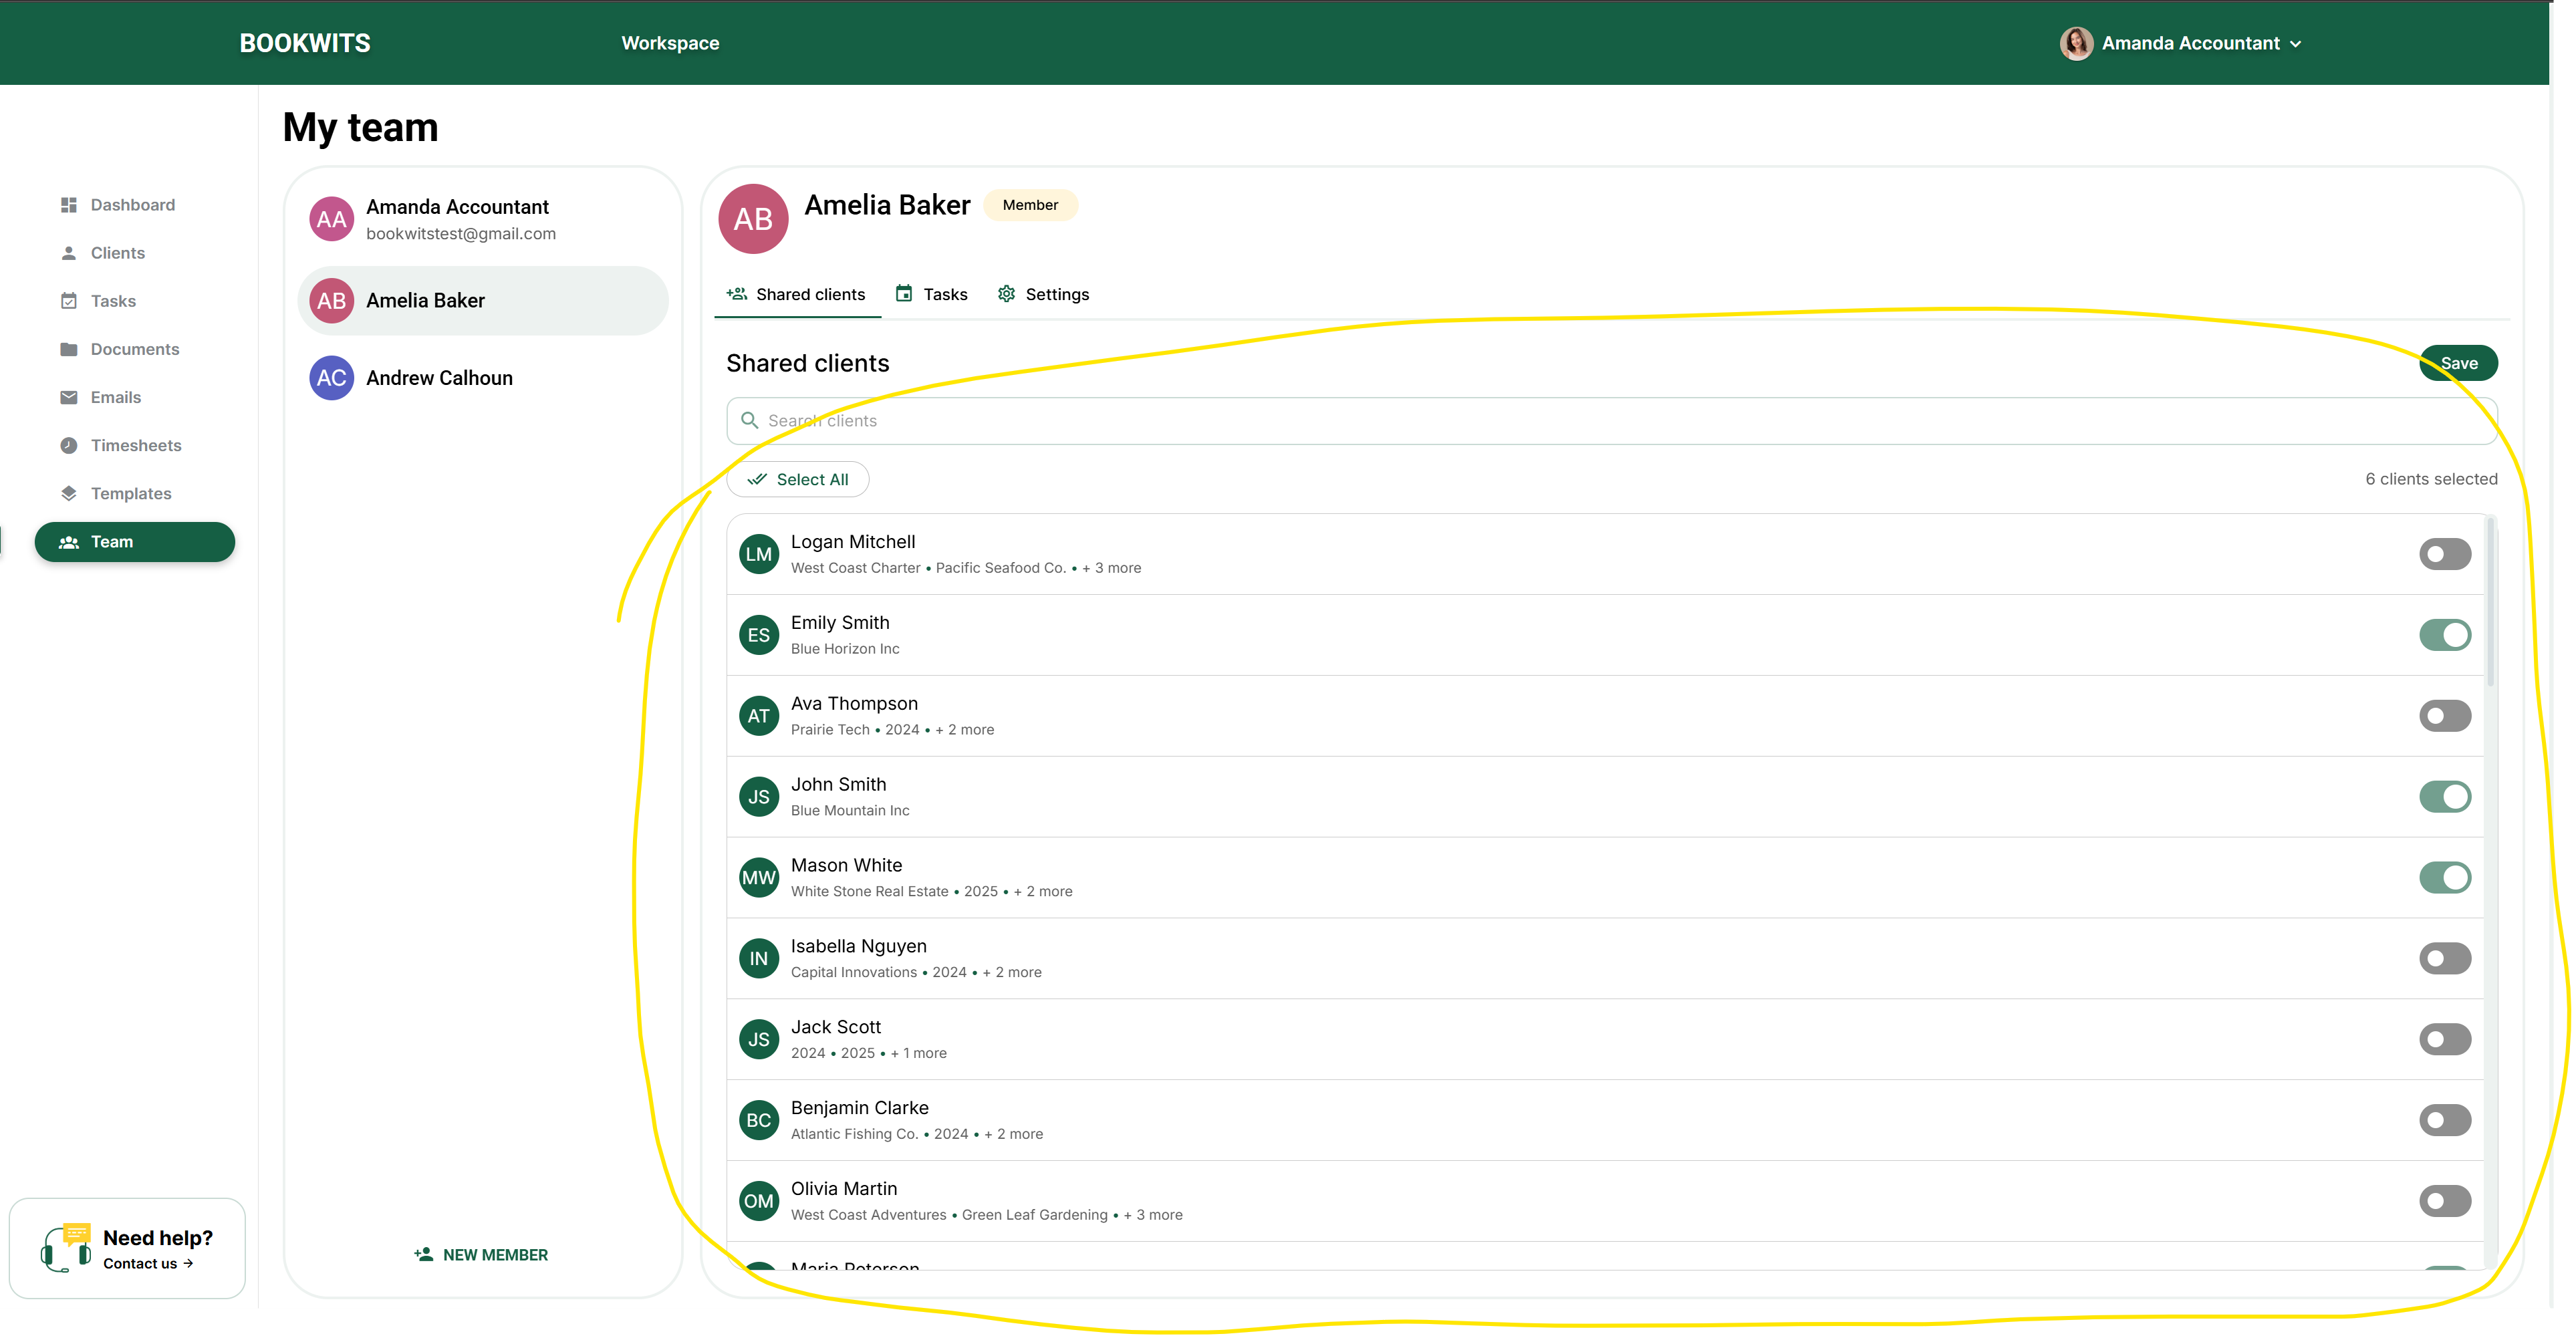
Steps
- Go to Team
- Click a team member
- Select the clients they should have access to
- Click Save
What access includes
Sharing a client grants access to:
- The Client
- All Companies under that client
- All Personal Tax Years
- All Documents
- Anything related tied to that client (work + context)
Assign access when creating or editing clients
You can assign access during client creation or by editing the client
later—useful for onboarding staff, reassigning ownership, and privacy
control.
Client “Manager” assignment (ownership clarity)
You can assign a team member as the Manager for a
client so everyone knows:
- Who is responsible
- Who is the main internal point of contact
- Who should be mentioned/assigned tasks first
Best practice: every client should have exactly
one primary Manager.
Team access visibility (Clients table)
The Clients table includes a Team access column showing who currently has
access to that client.
Why it’s useful
- Auditing permissions
- Confirming a Member can see the right clients
- Avoiding “I can’t see the client” issues
See tasks assigned to a team member
From a team member context, you can review which tasks are assigned to them to
understand workload and responsibility.
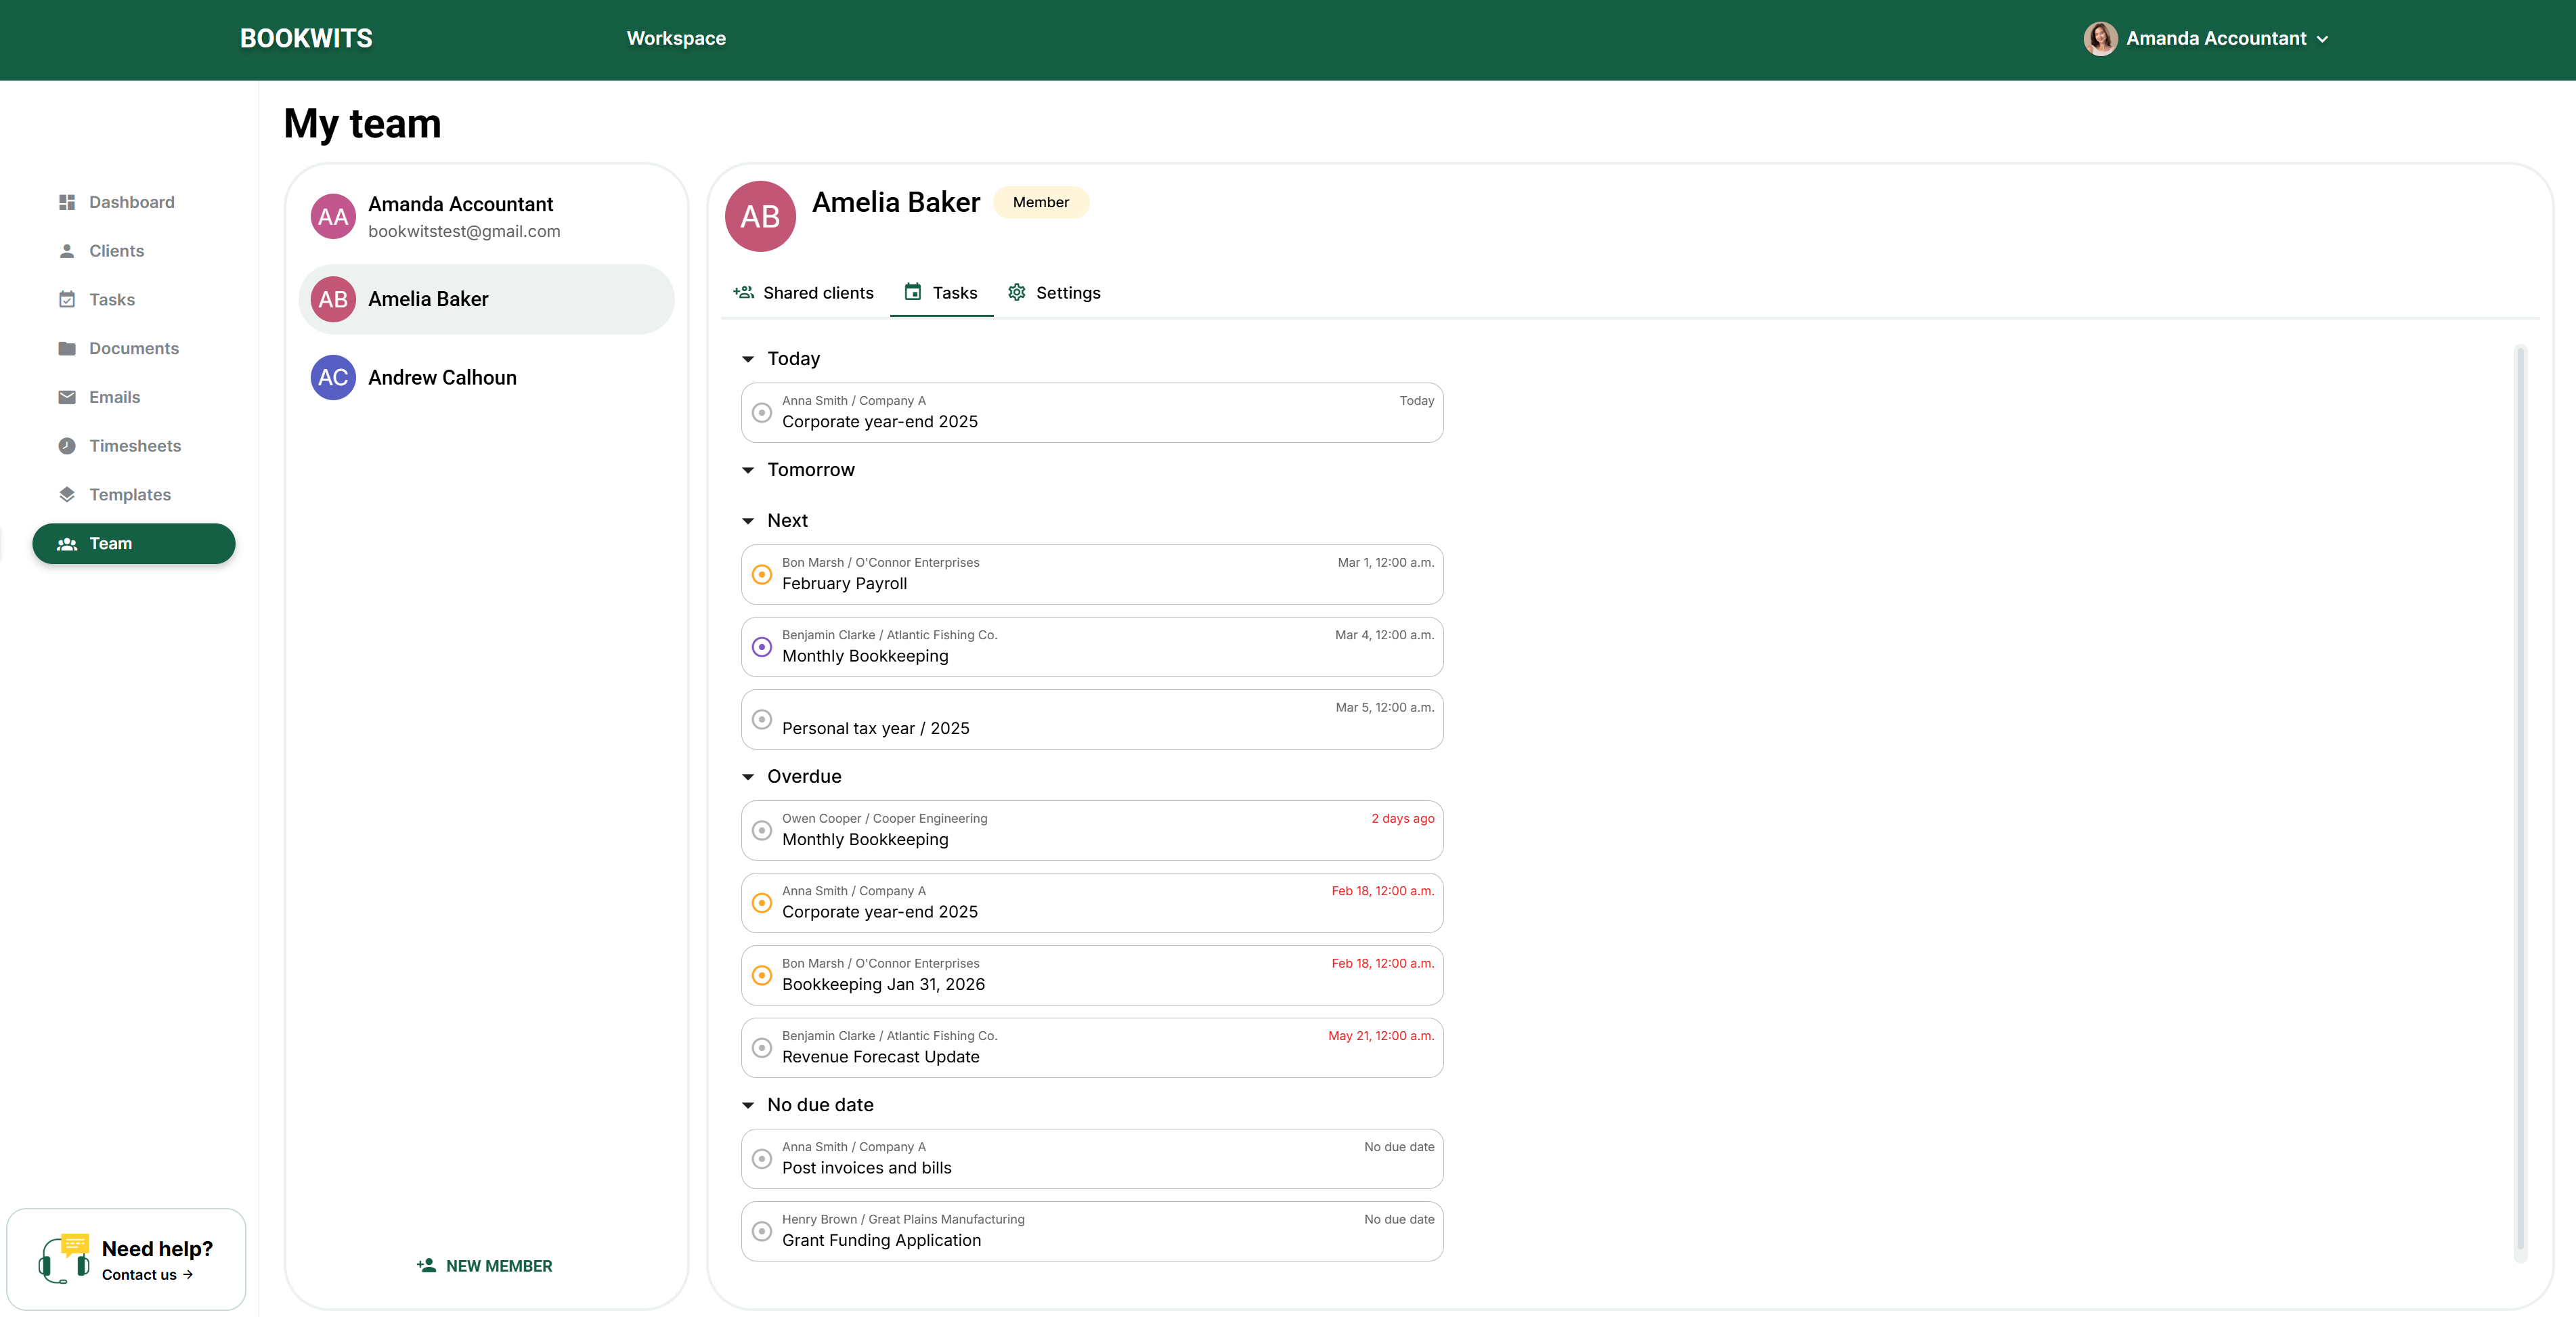
Typical uses
- Onboarding a new hire (confirm they have tasks)
- Checking bandwidth (are they overloaded?)
- Redistributing work (reassign tasks if needed)
Remove a team member (revoke access)
If someone leaves the firm, remove them to instantly revoke access.
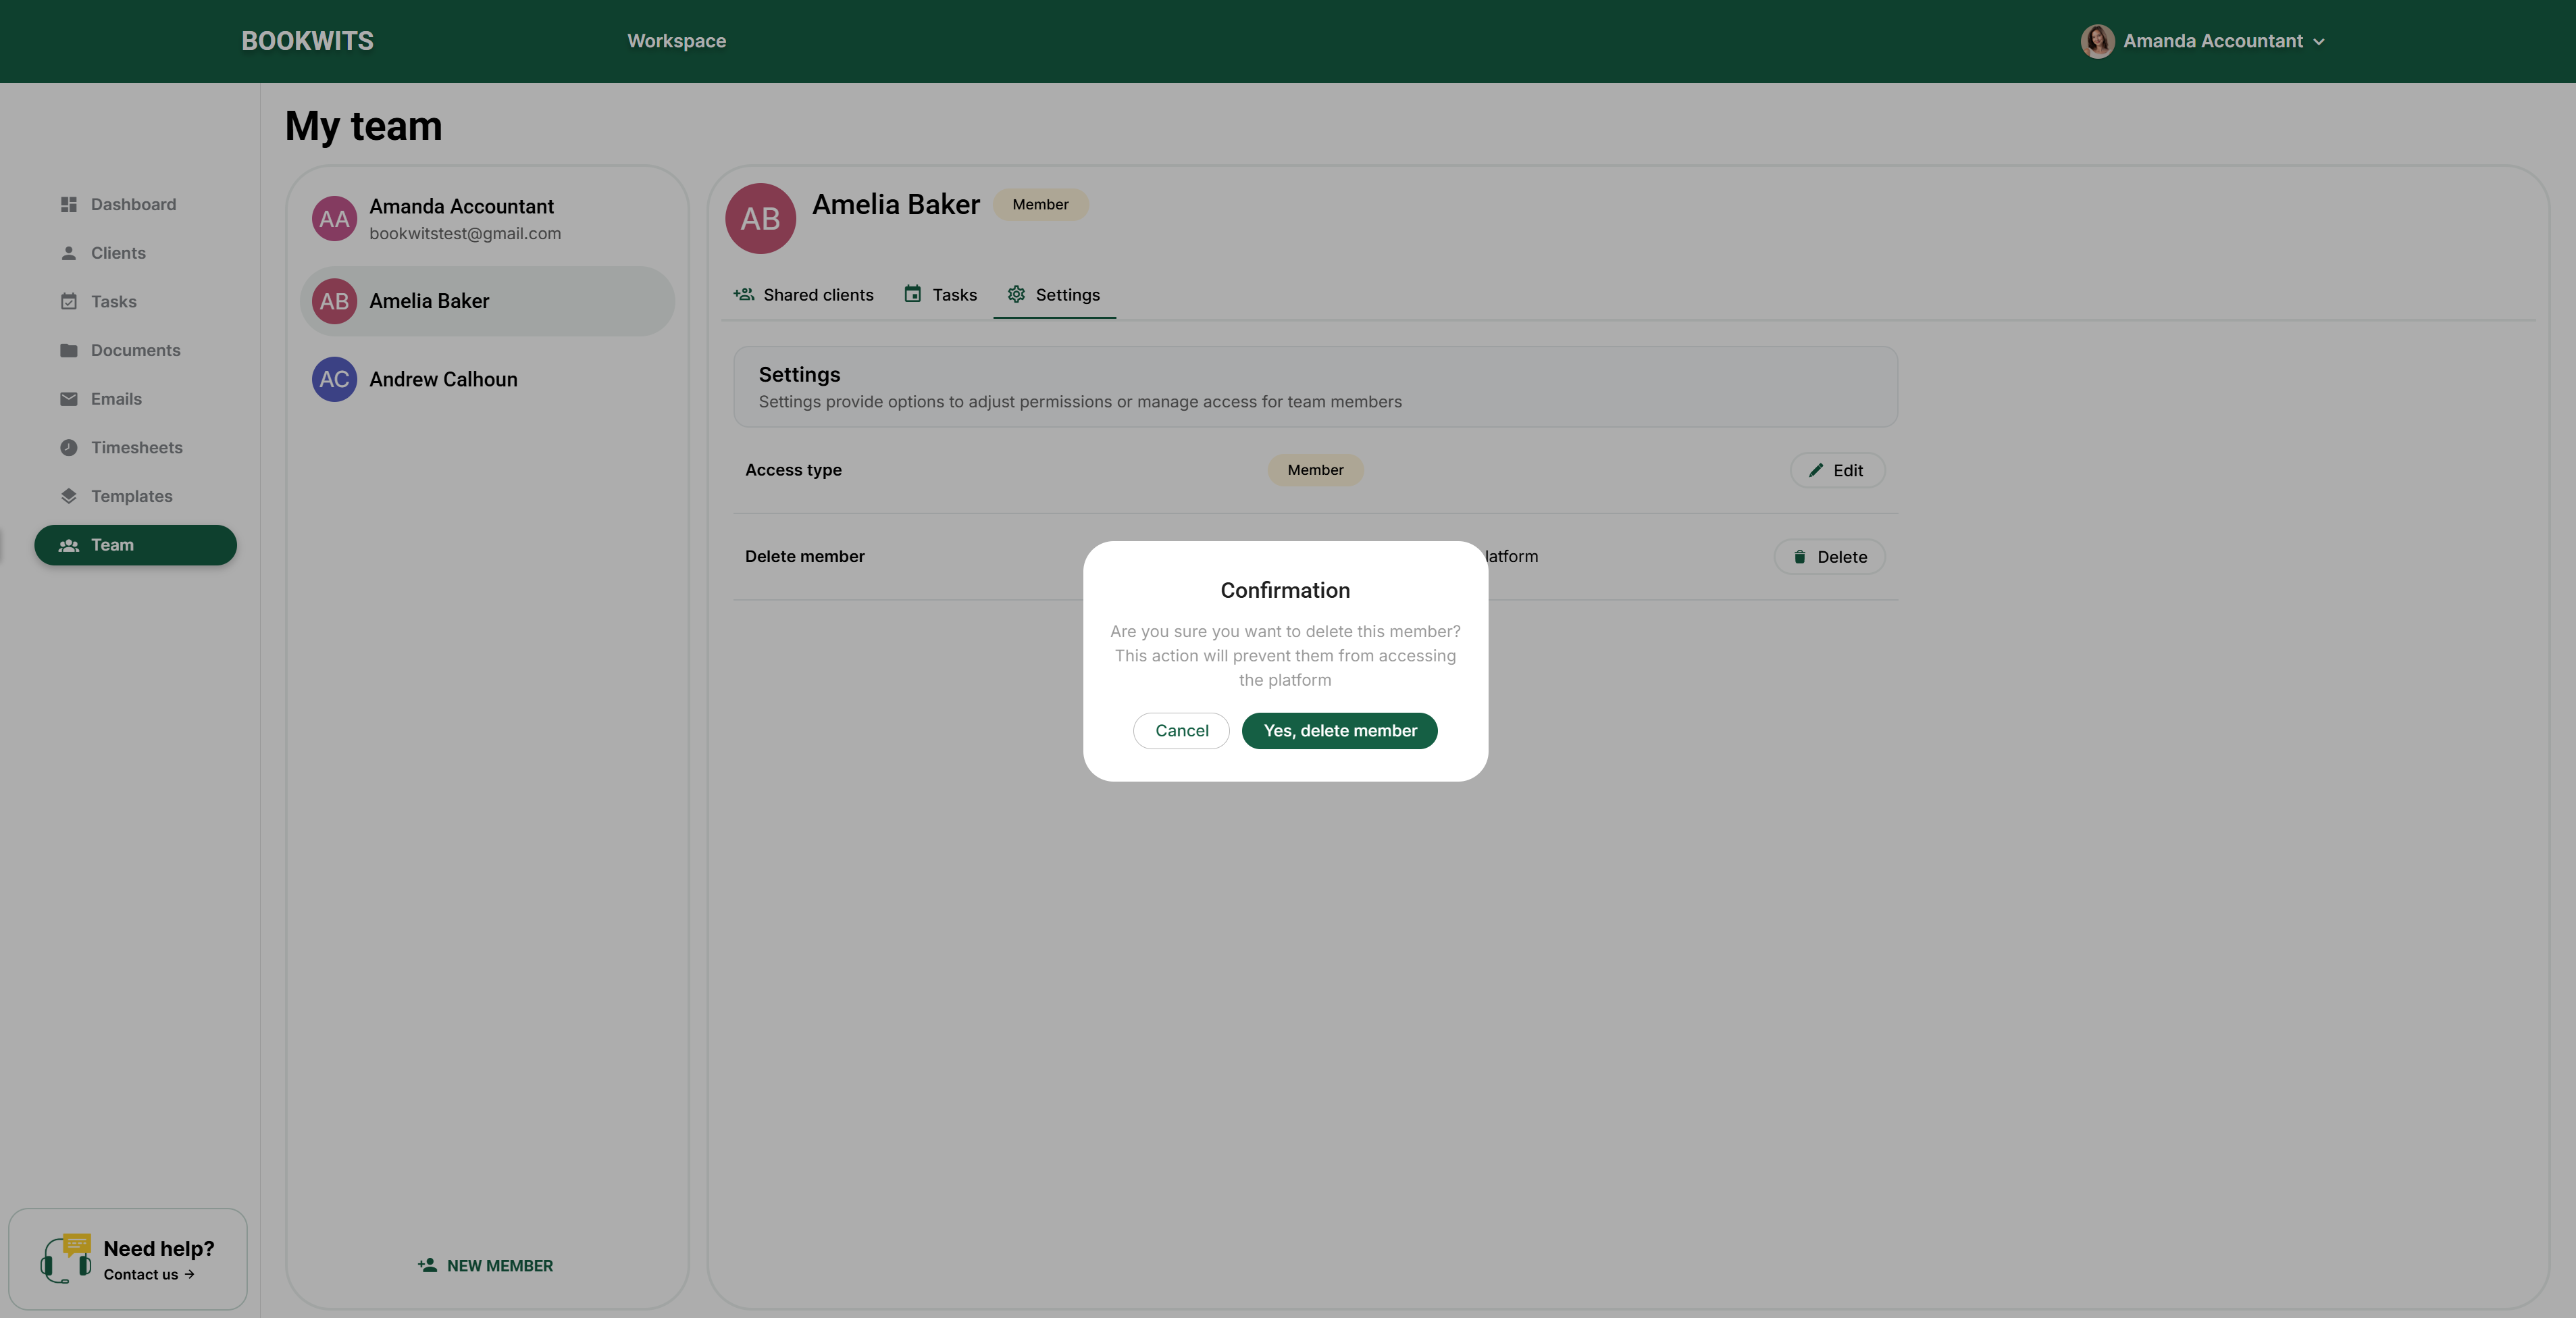
Steps
- Go to Team
- Open the team member profile
- Click Delete member
- Confirm
What this does
- Prevents them from accessing the platform
- Revokes access to all clients, documents, and workspace data
Settings panel (what you’ll see)
Inside a team member profile you’ll typically see: Access type
(Owner/Admin/Member) and Delete member.
Common beginner issues (quick fixes)
“My team member can’t see a client”
Most common cause: they are a Member and the client
was not shared.
Fix: Team → Member → select client(s) → Save.
“Should this person be Admin?”
Make them Admin only if they need access to all clients and the Team module.
Otherwise keep them Member and share only what they need.
“We reassigned a client—how do we reflect it?”
Update: (1) Client’s Manager, and (2) Team access list for that client (remove
old, add new).
Want help setting up roles and access cleanly?
Book a demo and we’ll help you map roles, client sharing, and manager ownership
so your team has the right access without over-sharing.