Back to Resources
Video Walkthrough (Personal Tax Checklist Module)
If you have a walkthrough video, drop it here. It’s most helpful to show: how to
use the Personal Tax Checklist Module effectively.
HOW TO USE BOOKWITS
PERSONAL TAX CHECKLISTS
BEGINNER
Personal Tax Checklists
Personal Tax Checklists live inside Client Profile → Personal Taxes. They let you create a tax year (e.g., 2025) and send a guided checklist so the client can submit info and upload documents with minimal friction.
How to Use Bookwits
10 min read
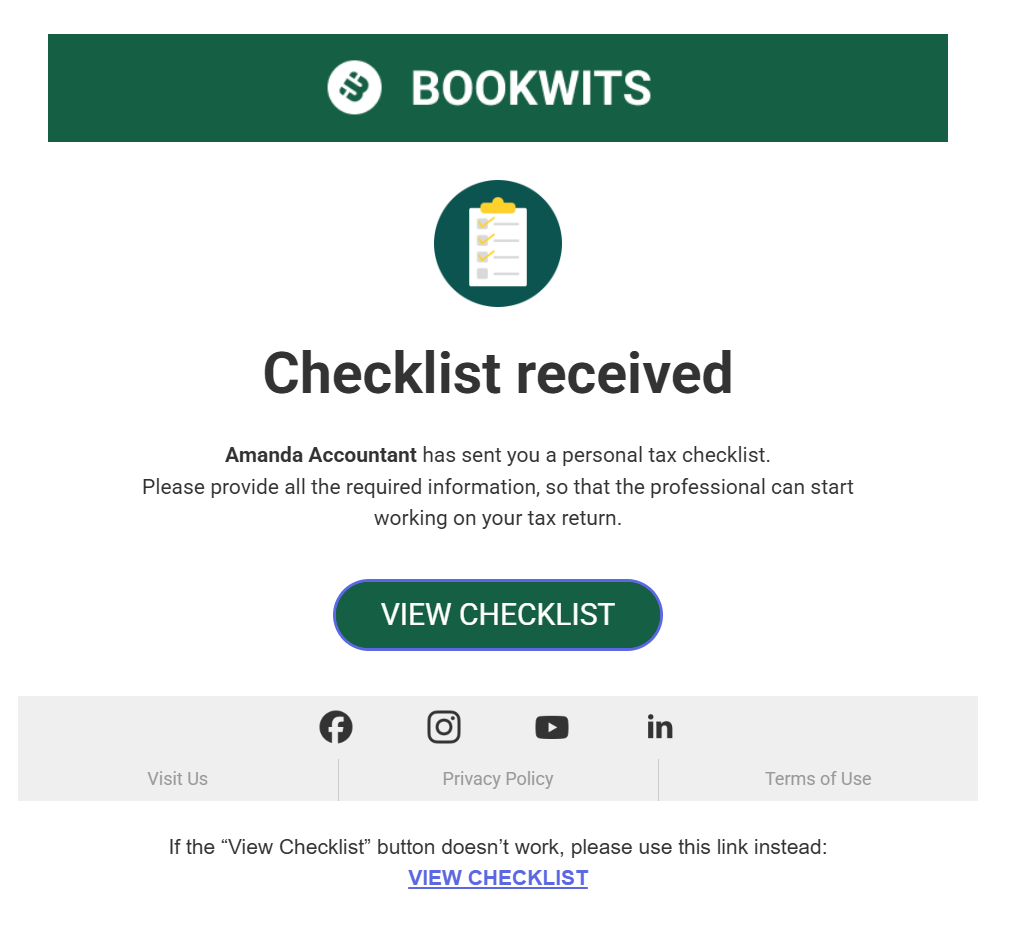
Frictionless completion
The client does not need to register to fill out
the checklist. They receive a link, complete it online, and you get notified
when it’s submitted.
Where to find Personal Tax Checklists
Personal Tax Checklists live in:
Client Profile → Personal Taxes → Year (e.g., 2025) → Checklists.
What you’ll see in a client profile
Tax years appear as tabs (2022, 2023, 2024, 2025), and each year has
navigation like:
Checklists
Tasks
Documents
Guidelines
Use Checklists to create and manage checklist
submissions for that tax year.
What Personal Tax Checklists are for (plain English)
Personal Tax Checklists help you:
- Standardize what you collect for T1 preparation
- Reduce back-and-forth emails for “missing info”
- Collect structured answers (not messy email paragraphs)
- Collect documents into the right folders automatically
A checklist is linked to
- A specific client
- A specific tax year
- Optional: multiple people under the same client (spouse, dependants, family members)
Step 1: Create a personal tax year (example: 2025)
Steps
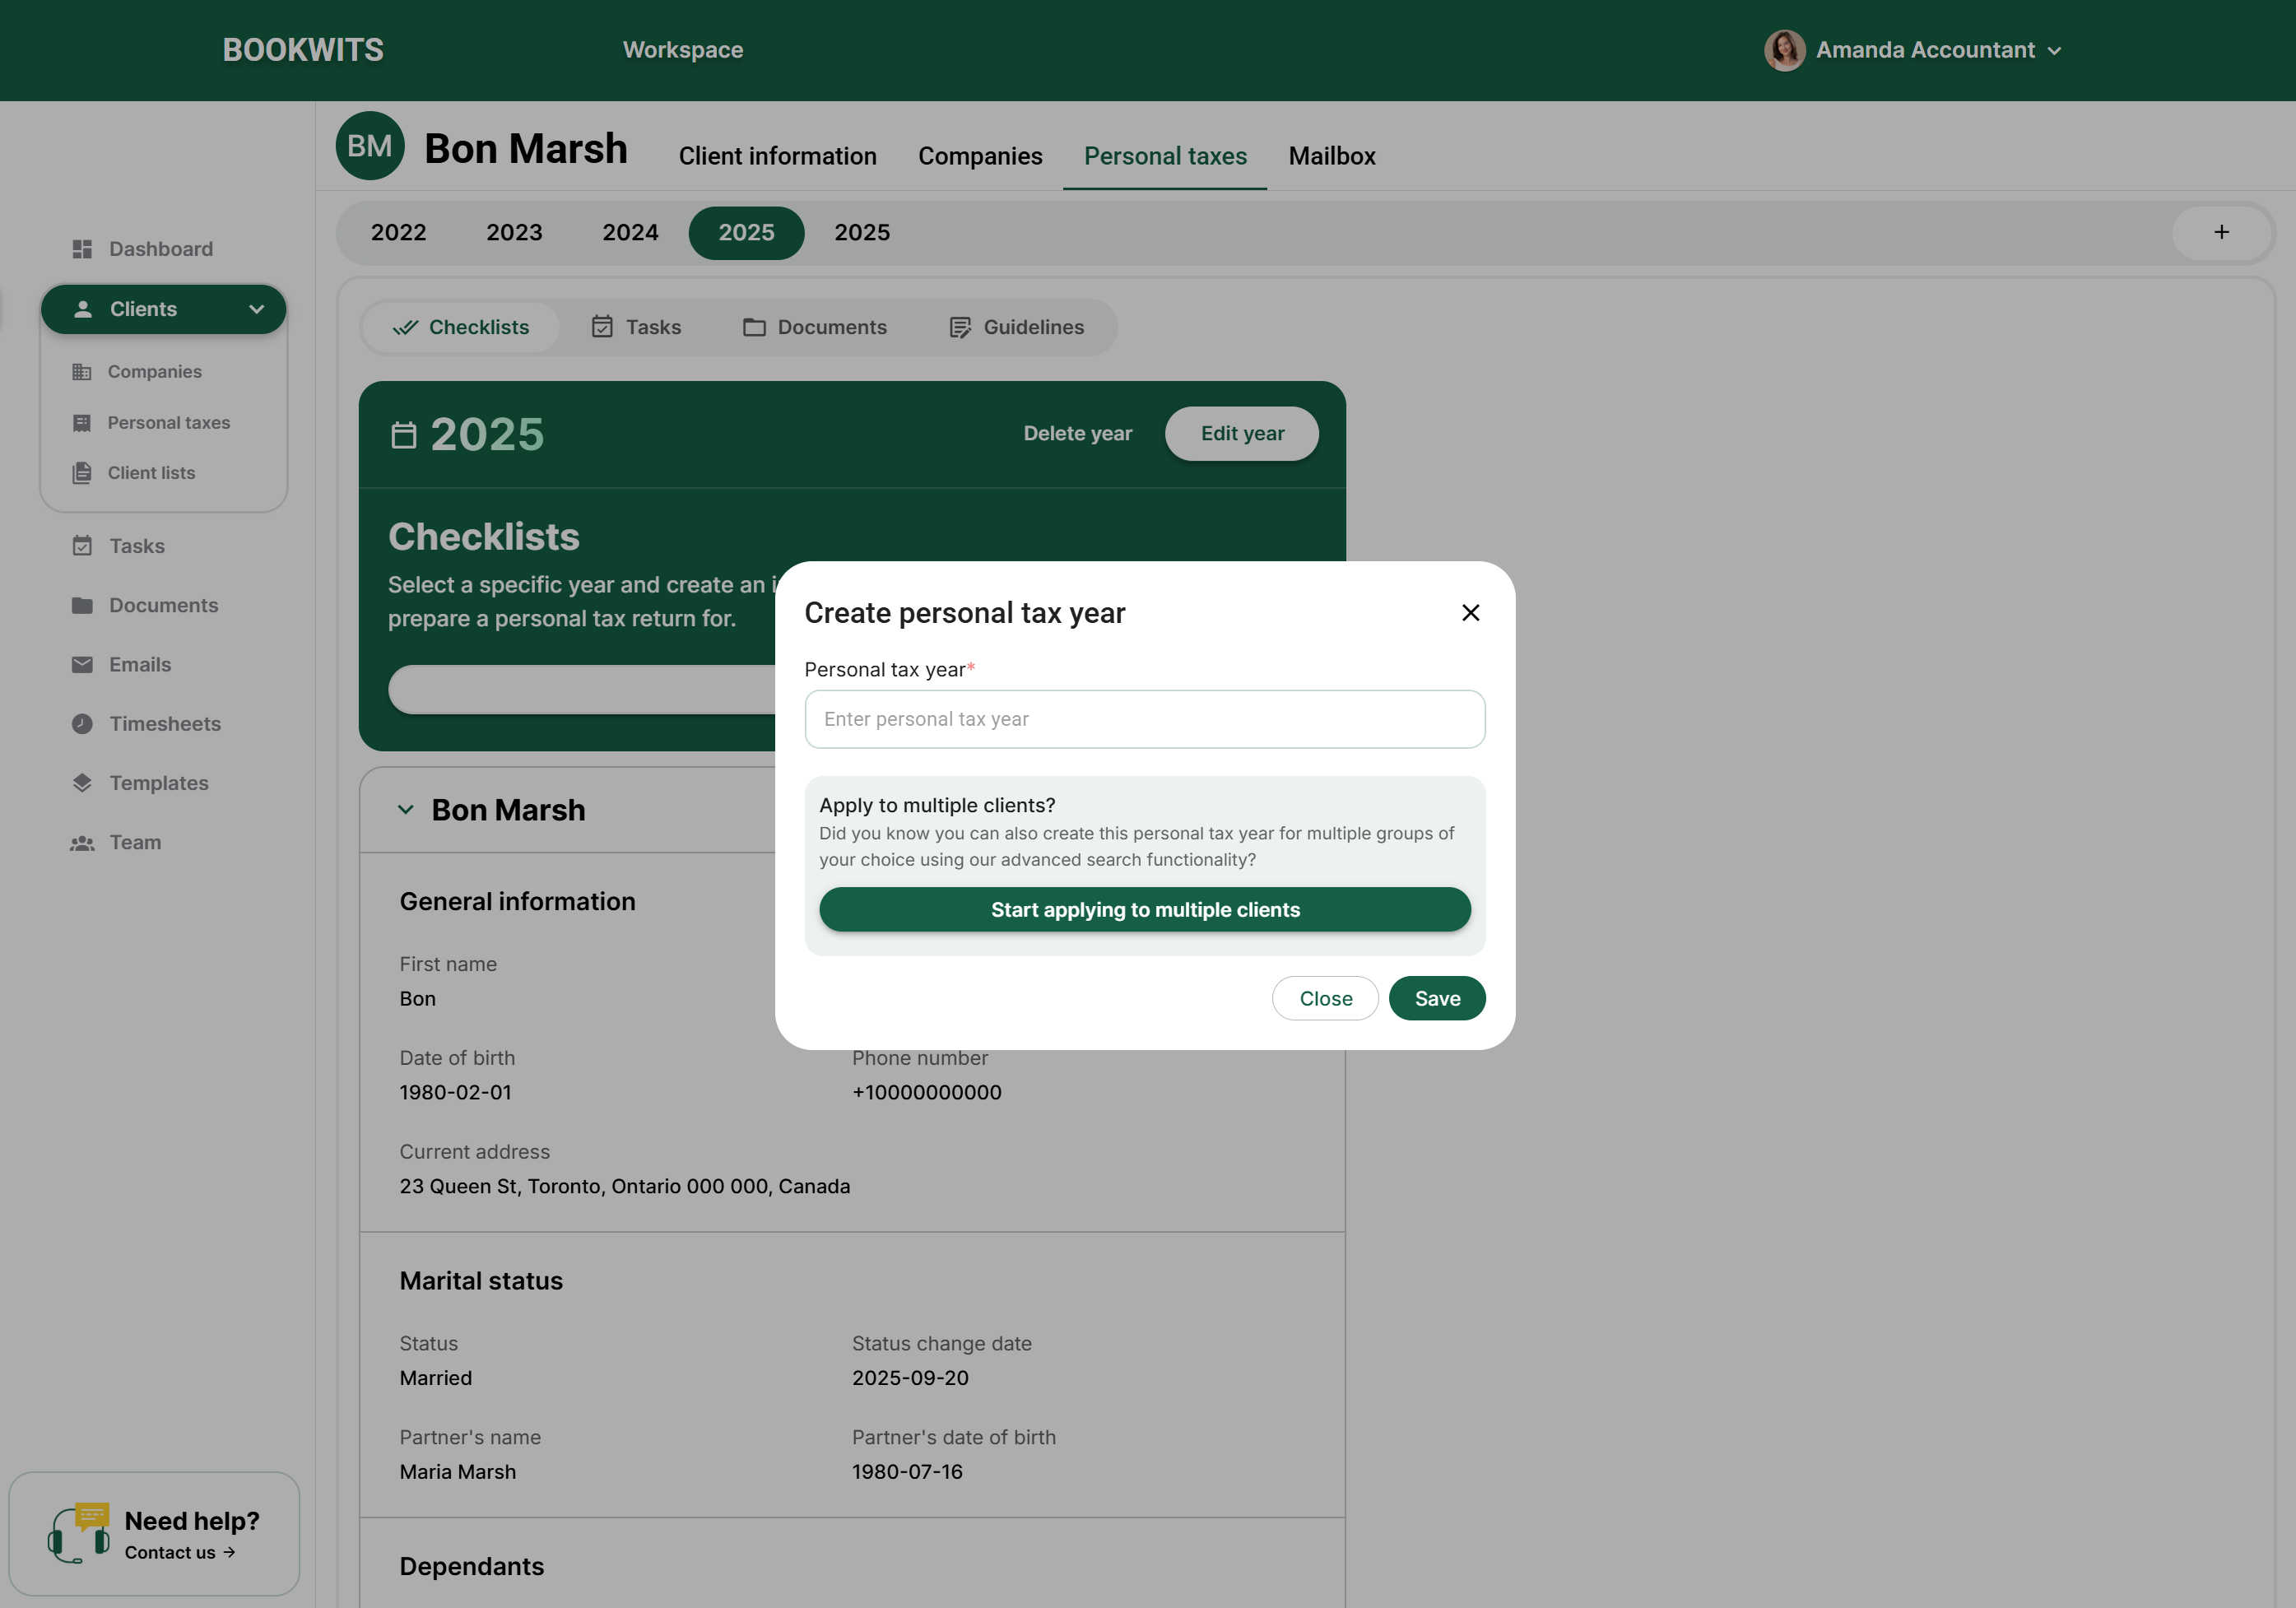
- Open the client profile
- Go to Personal Taxes
- Click + Add New Tax Year
- Select the year (e.g., 2025)
What this does
It creates the year container where checklists,
tasks, and
documents will live.
Step 2: Send a checklist to the client
After the year exists (e.g., 2025), click
Send checklist.
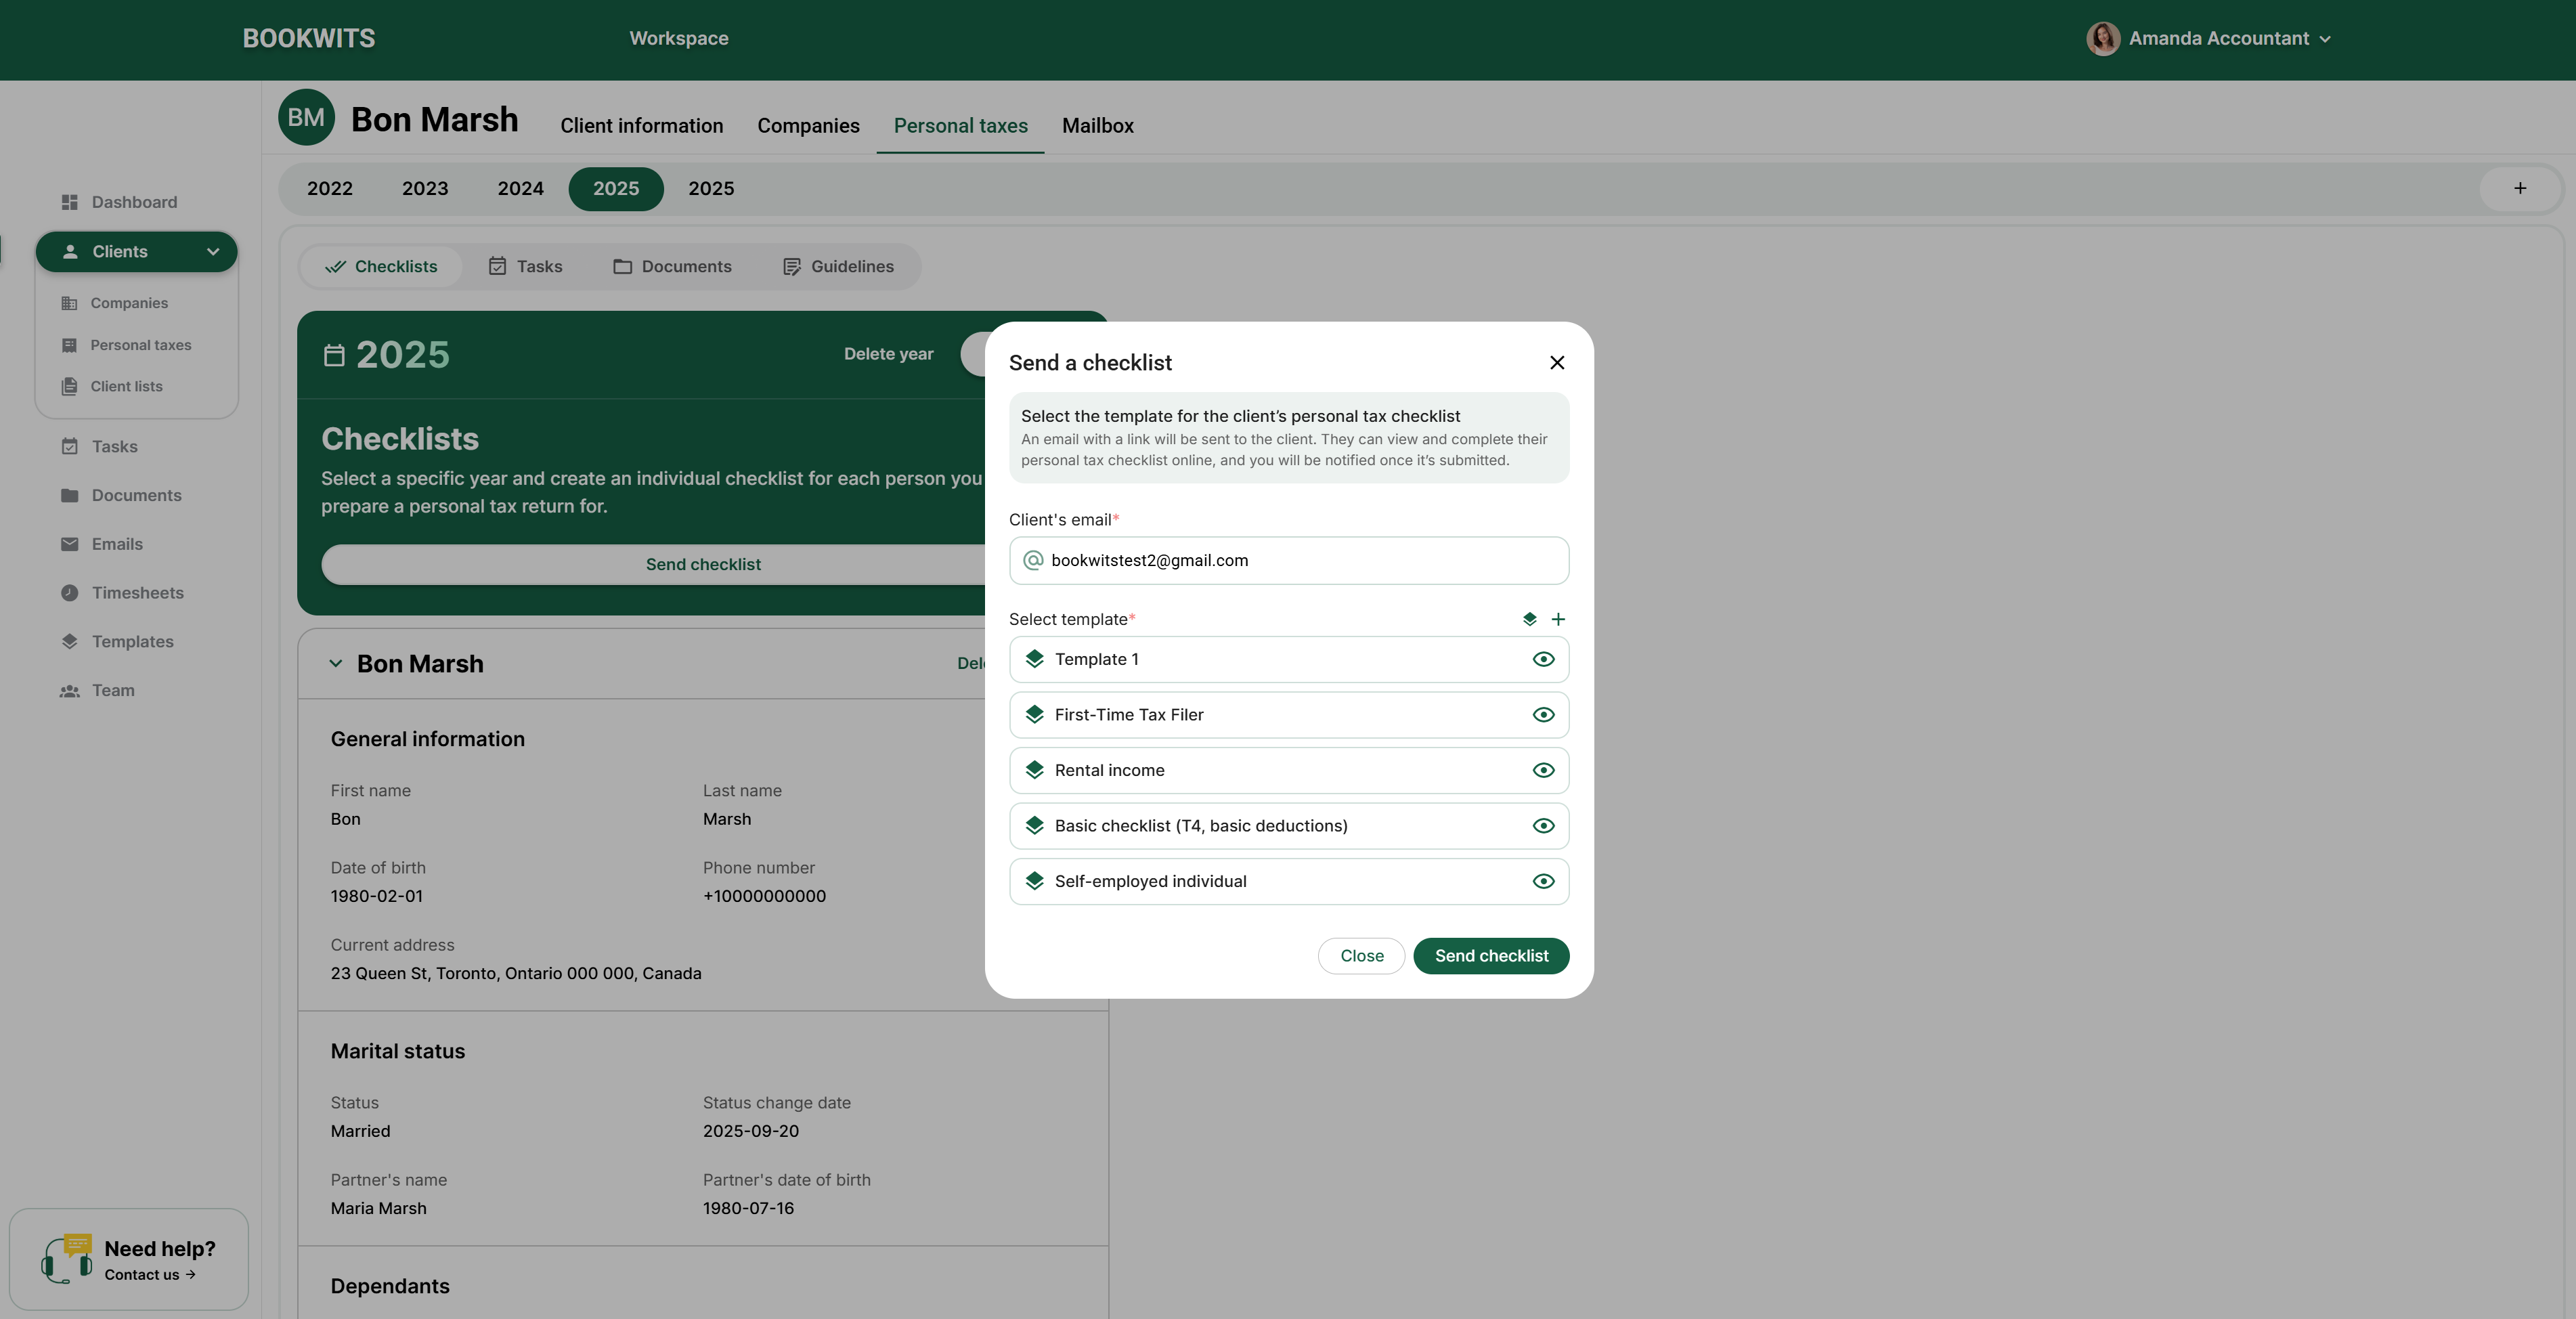
What the dialog typically includes
- Client email*
- Select a template*
Example templates: First-Time Tax Filer, Rental income, Basic checklist,
Self-employed individual.
What sending does
- Bookwits emails the client a link to the checklist
- The client completes it online
- You’re notified by email when it’s submitted
Important: the client does not need to register
to complete the checklist.
Choosing a template (and previewing it)
Templates define what the client sees: sections, questions/fields, required
fields, and document upload areas.
Preview with the eye icon
In the “Send a checklist” dialog, click the eye icon to preview the
checklist before sending.
Preview helps you confirm
- It matches the client’s situation (basic vs rental vs self-employed)
- Required fields aren’t too heavy
- Wording is clear
What’s inside a checklist template
Templates are built from sections, each containing
fields the client fills out.
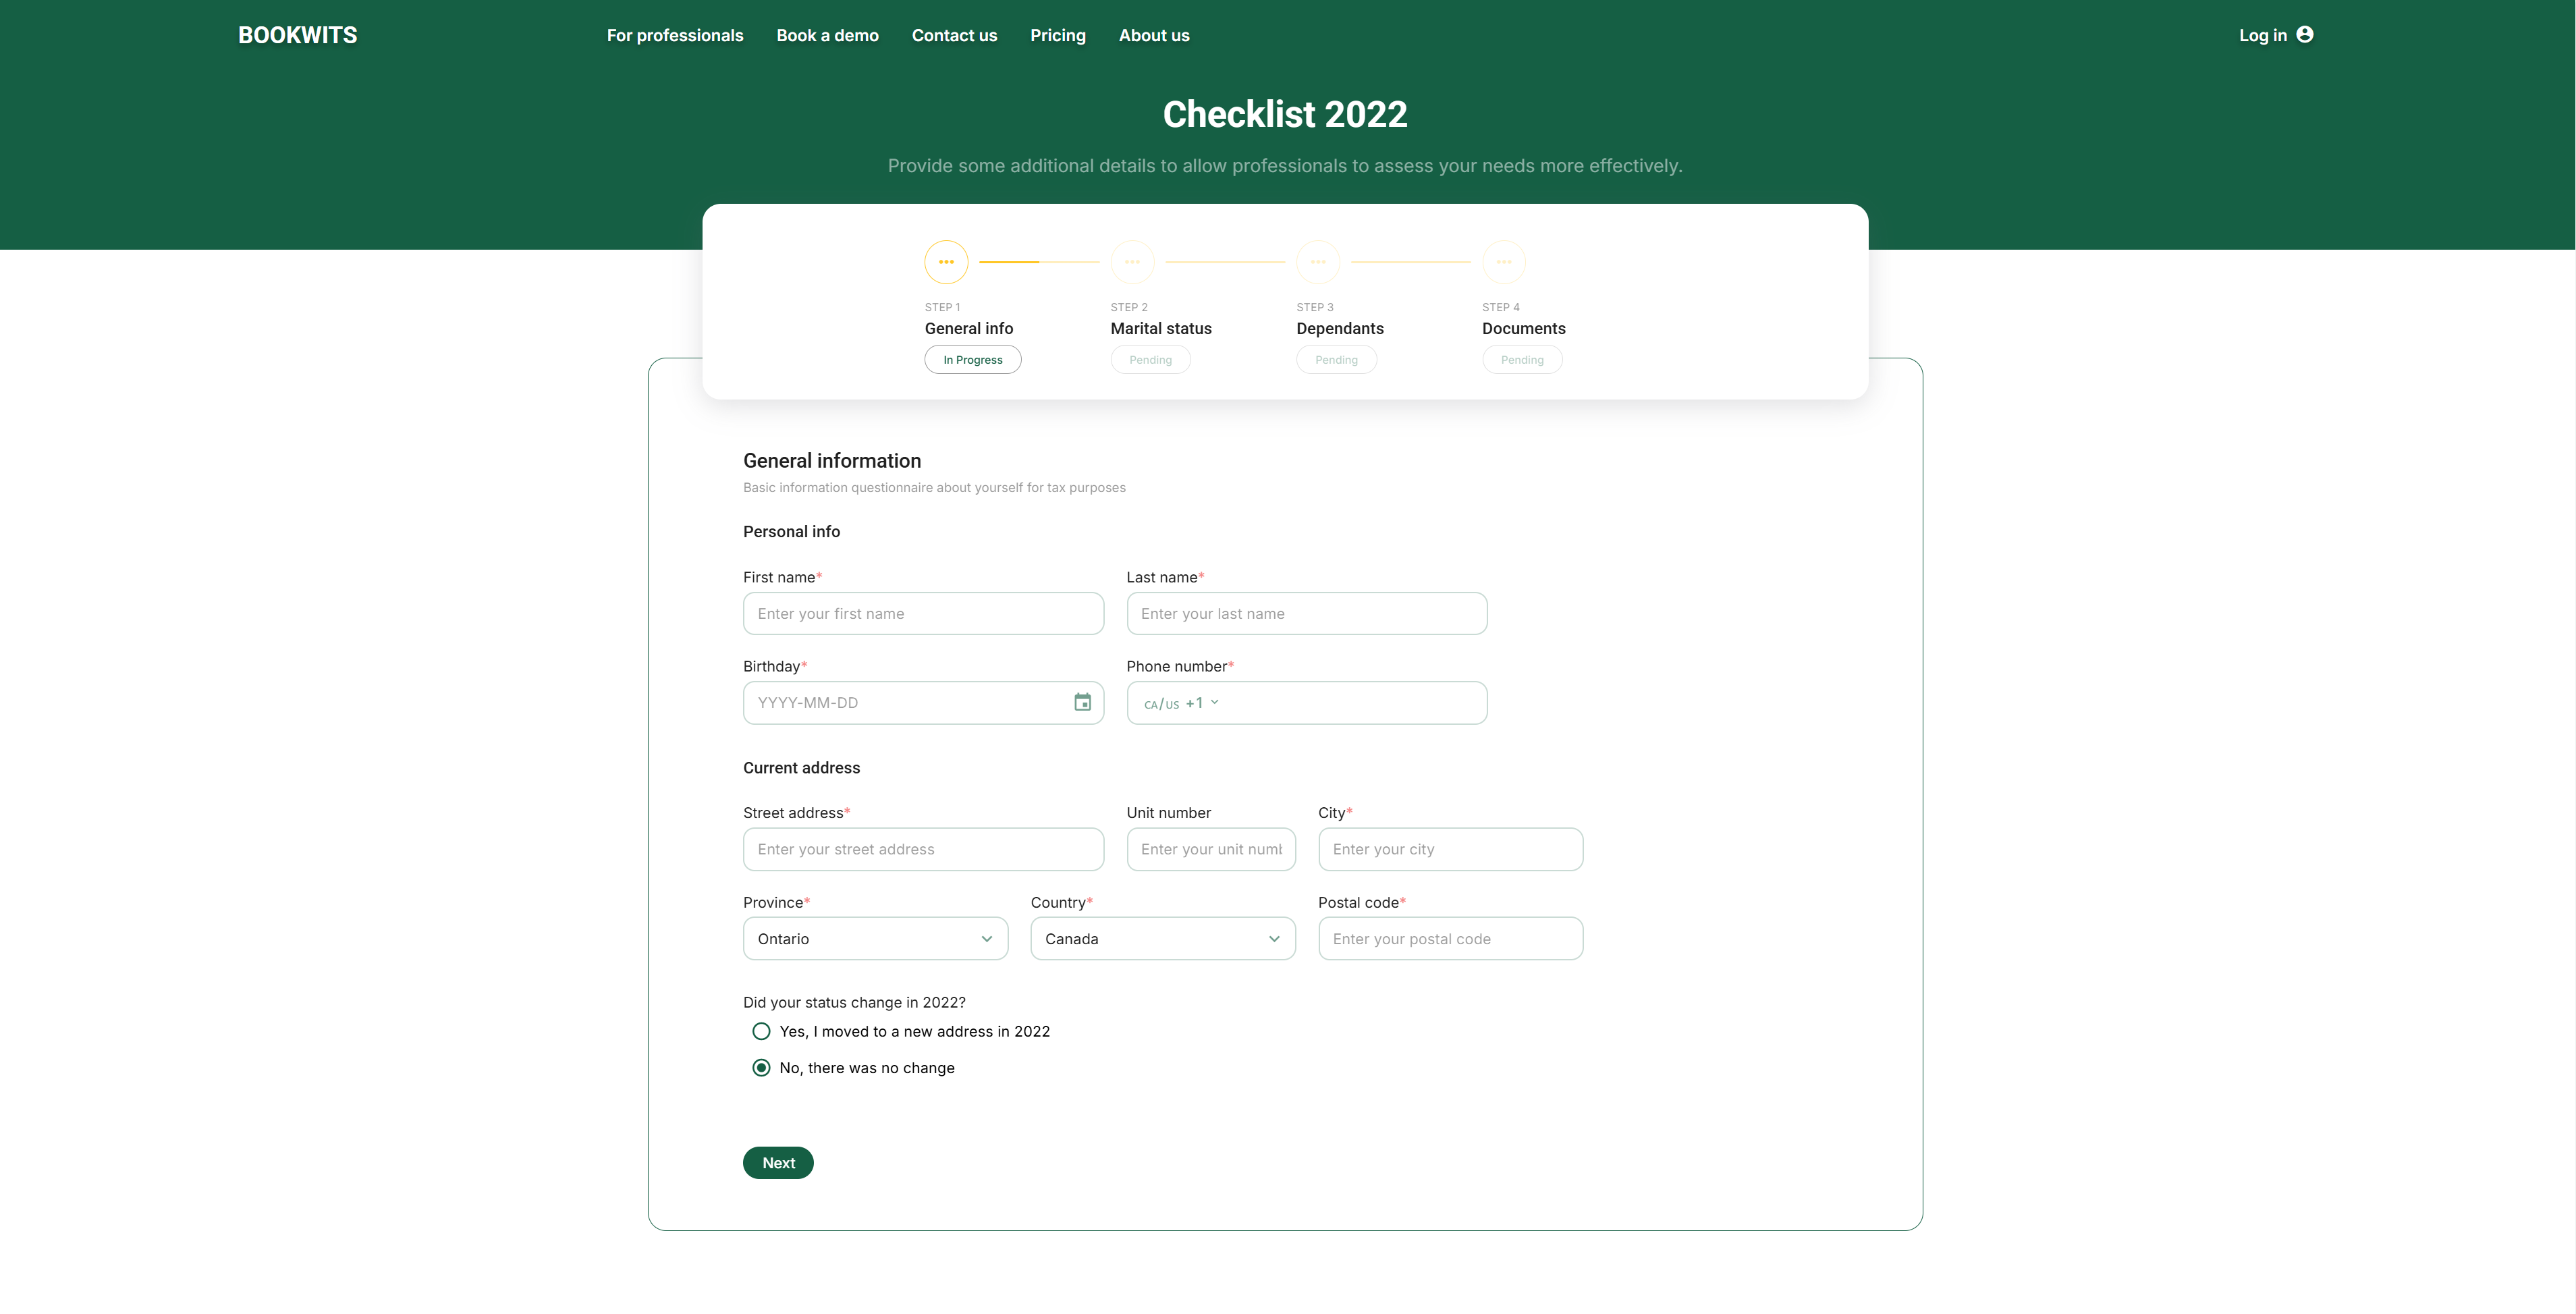
Example sections
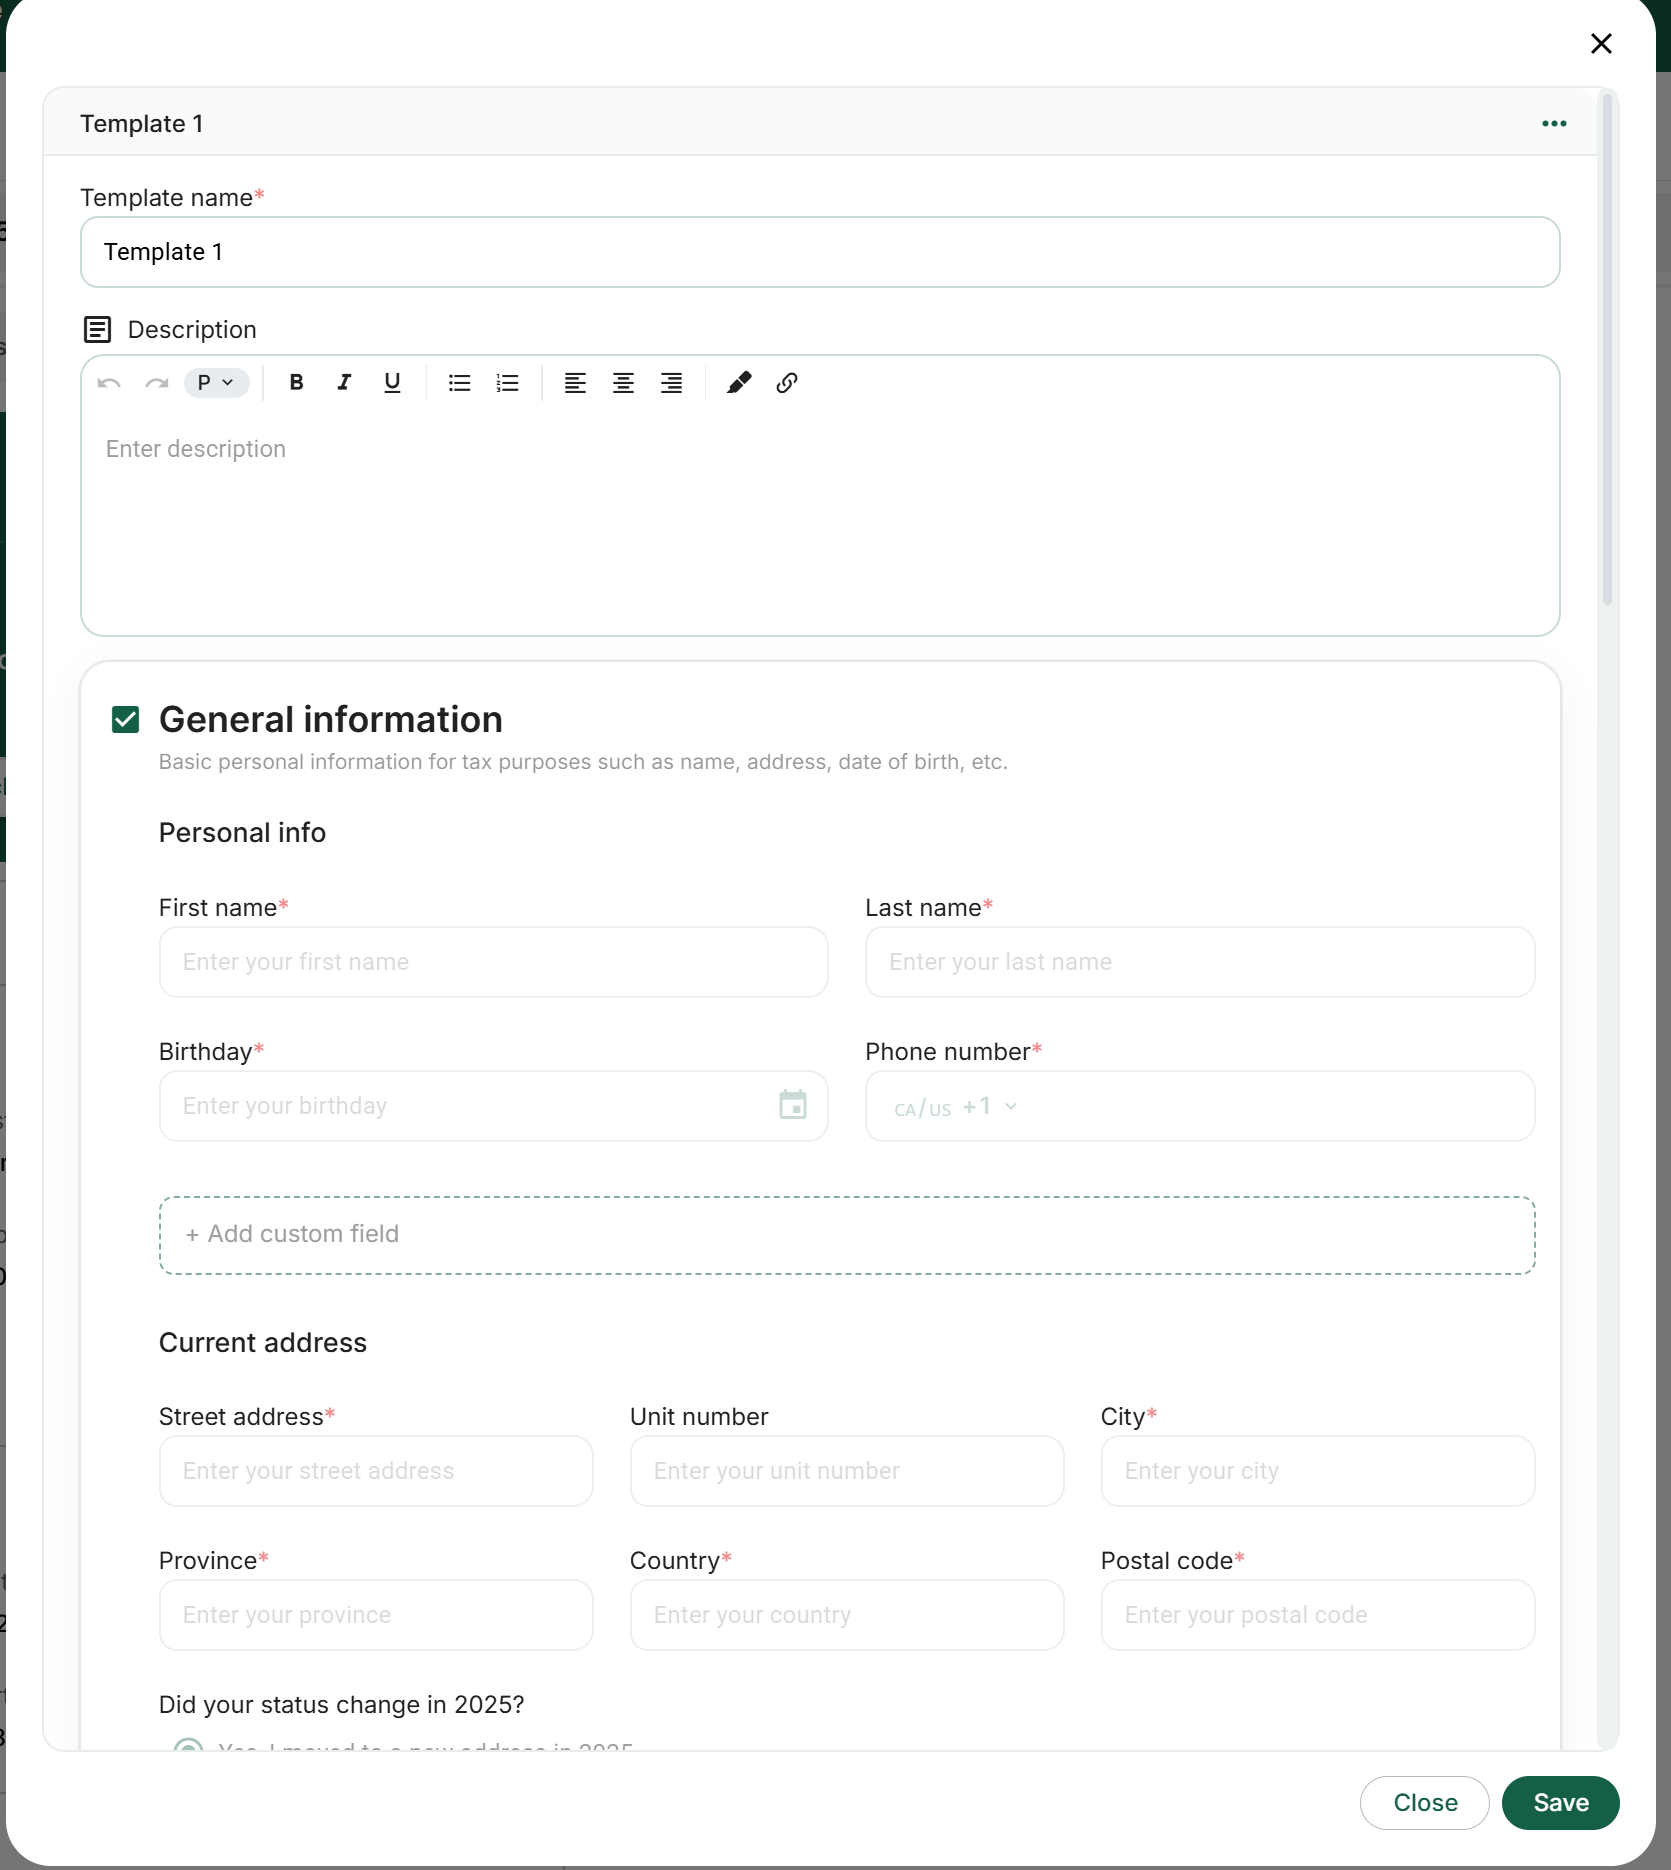

General information
Basic personal information for tax purposes (name, address, DOB, phone).
First name*
Last name*
Birthday*
Phone*
Address*
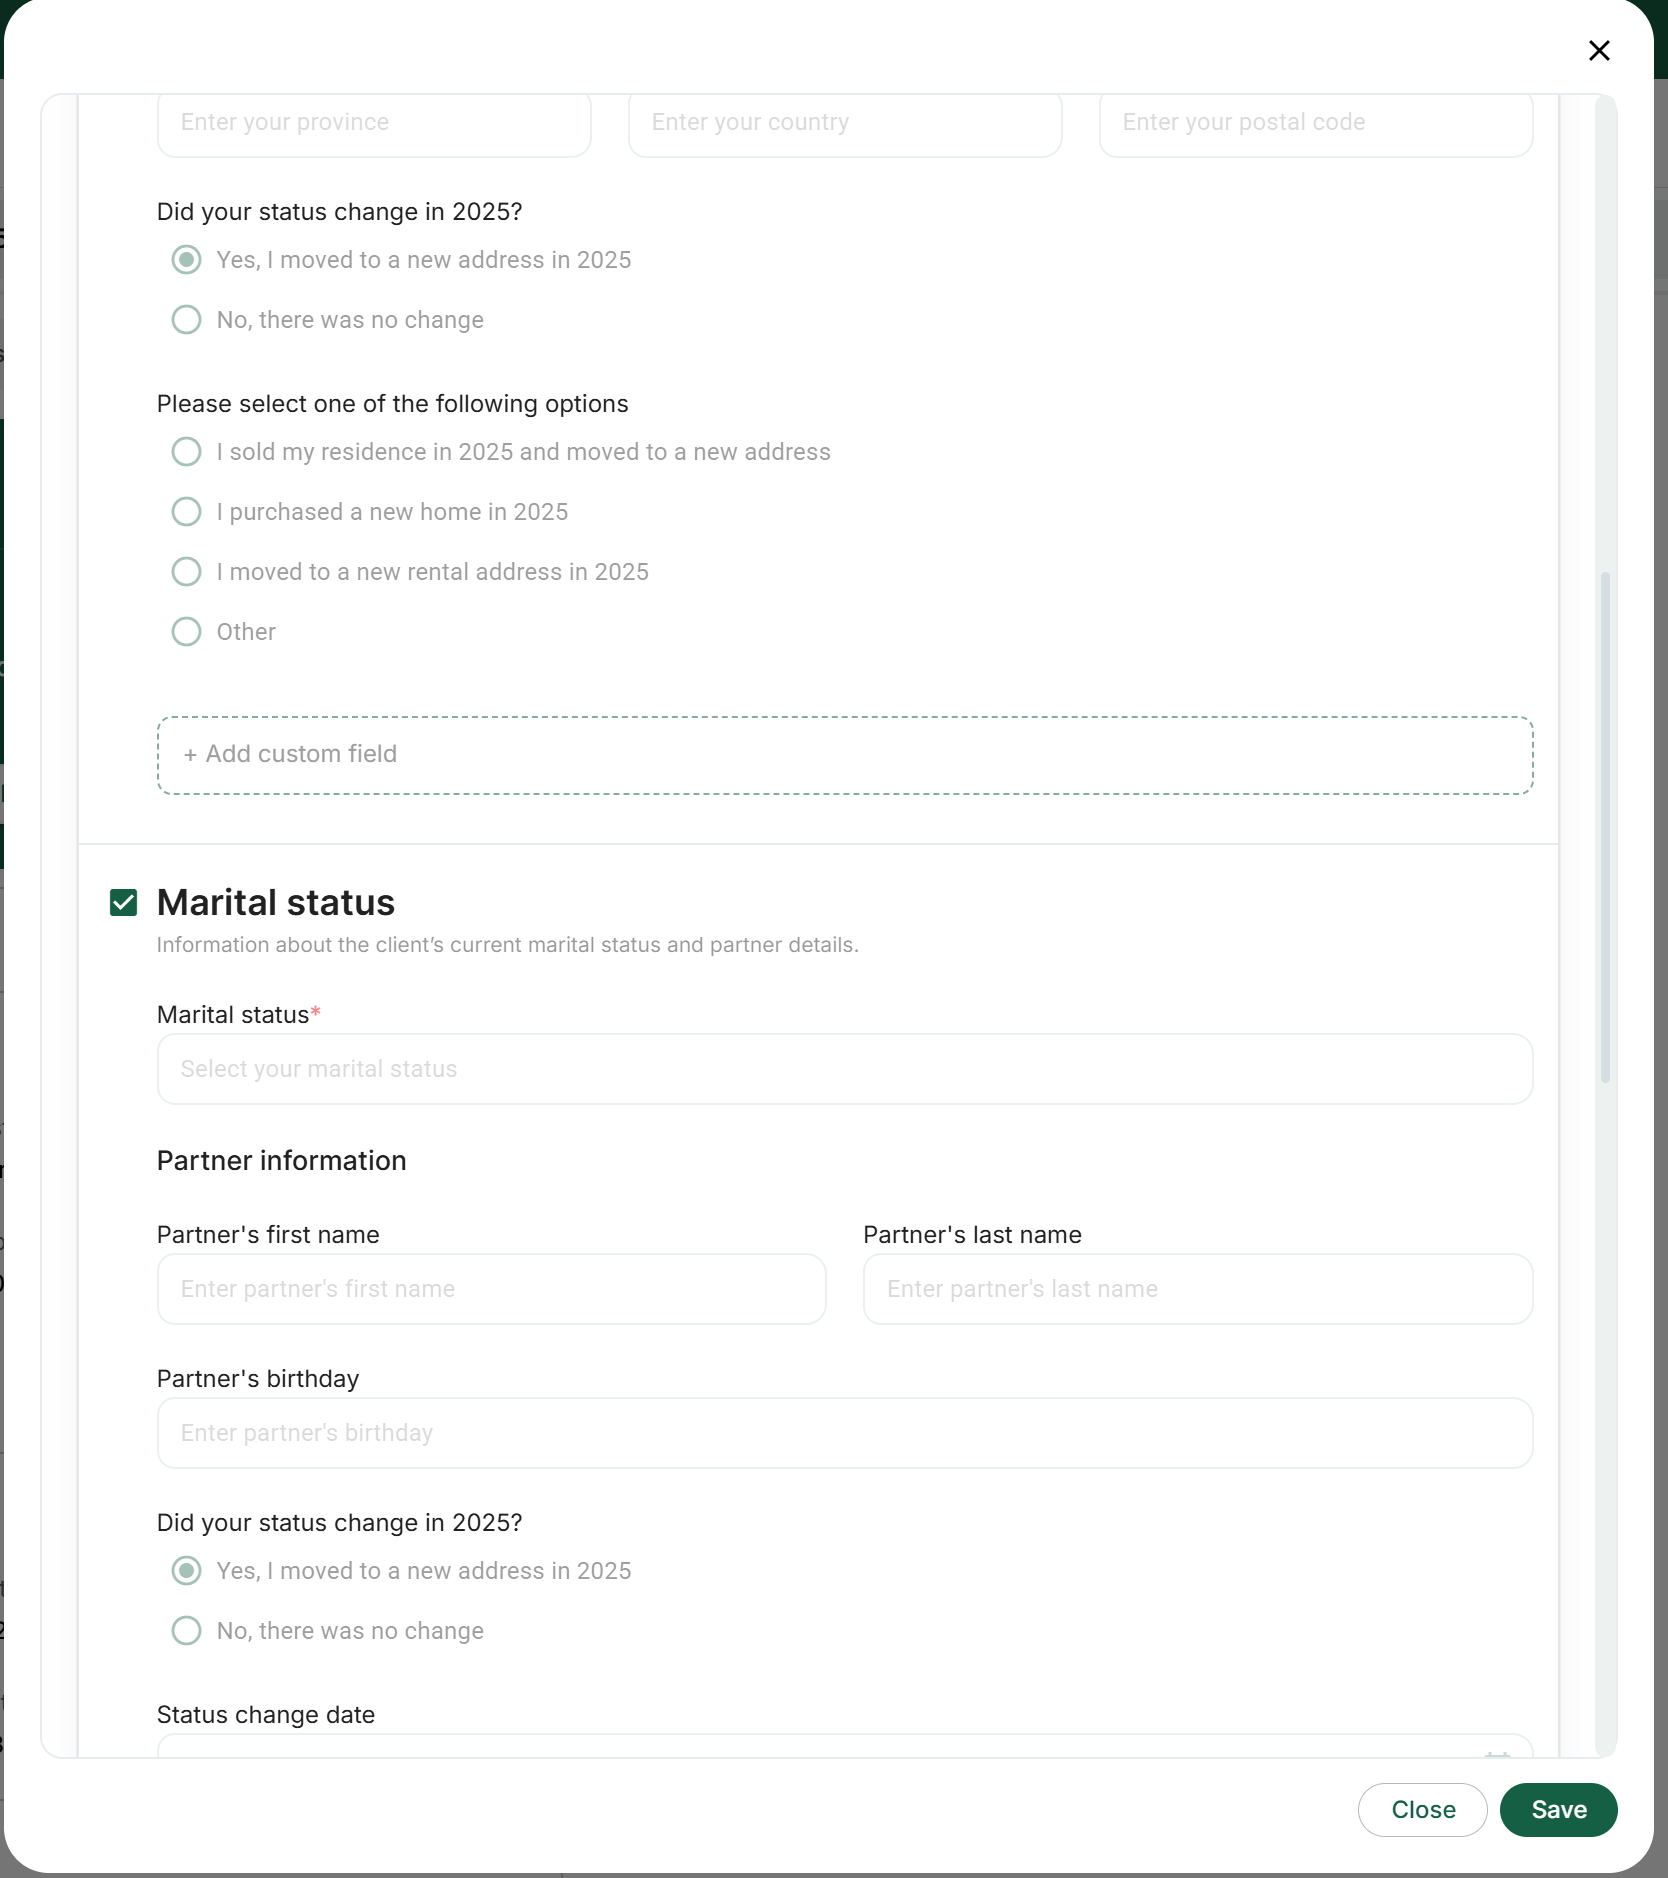
Marital status
Marital status*
Partner details
Status change date
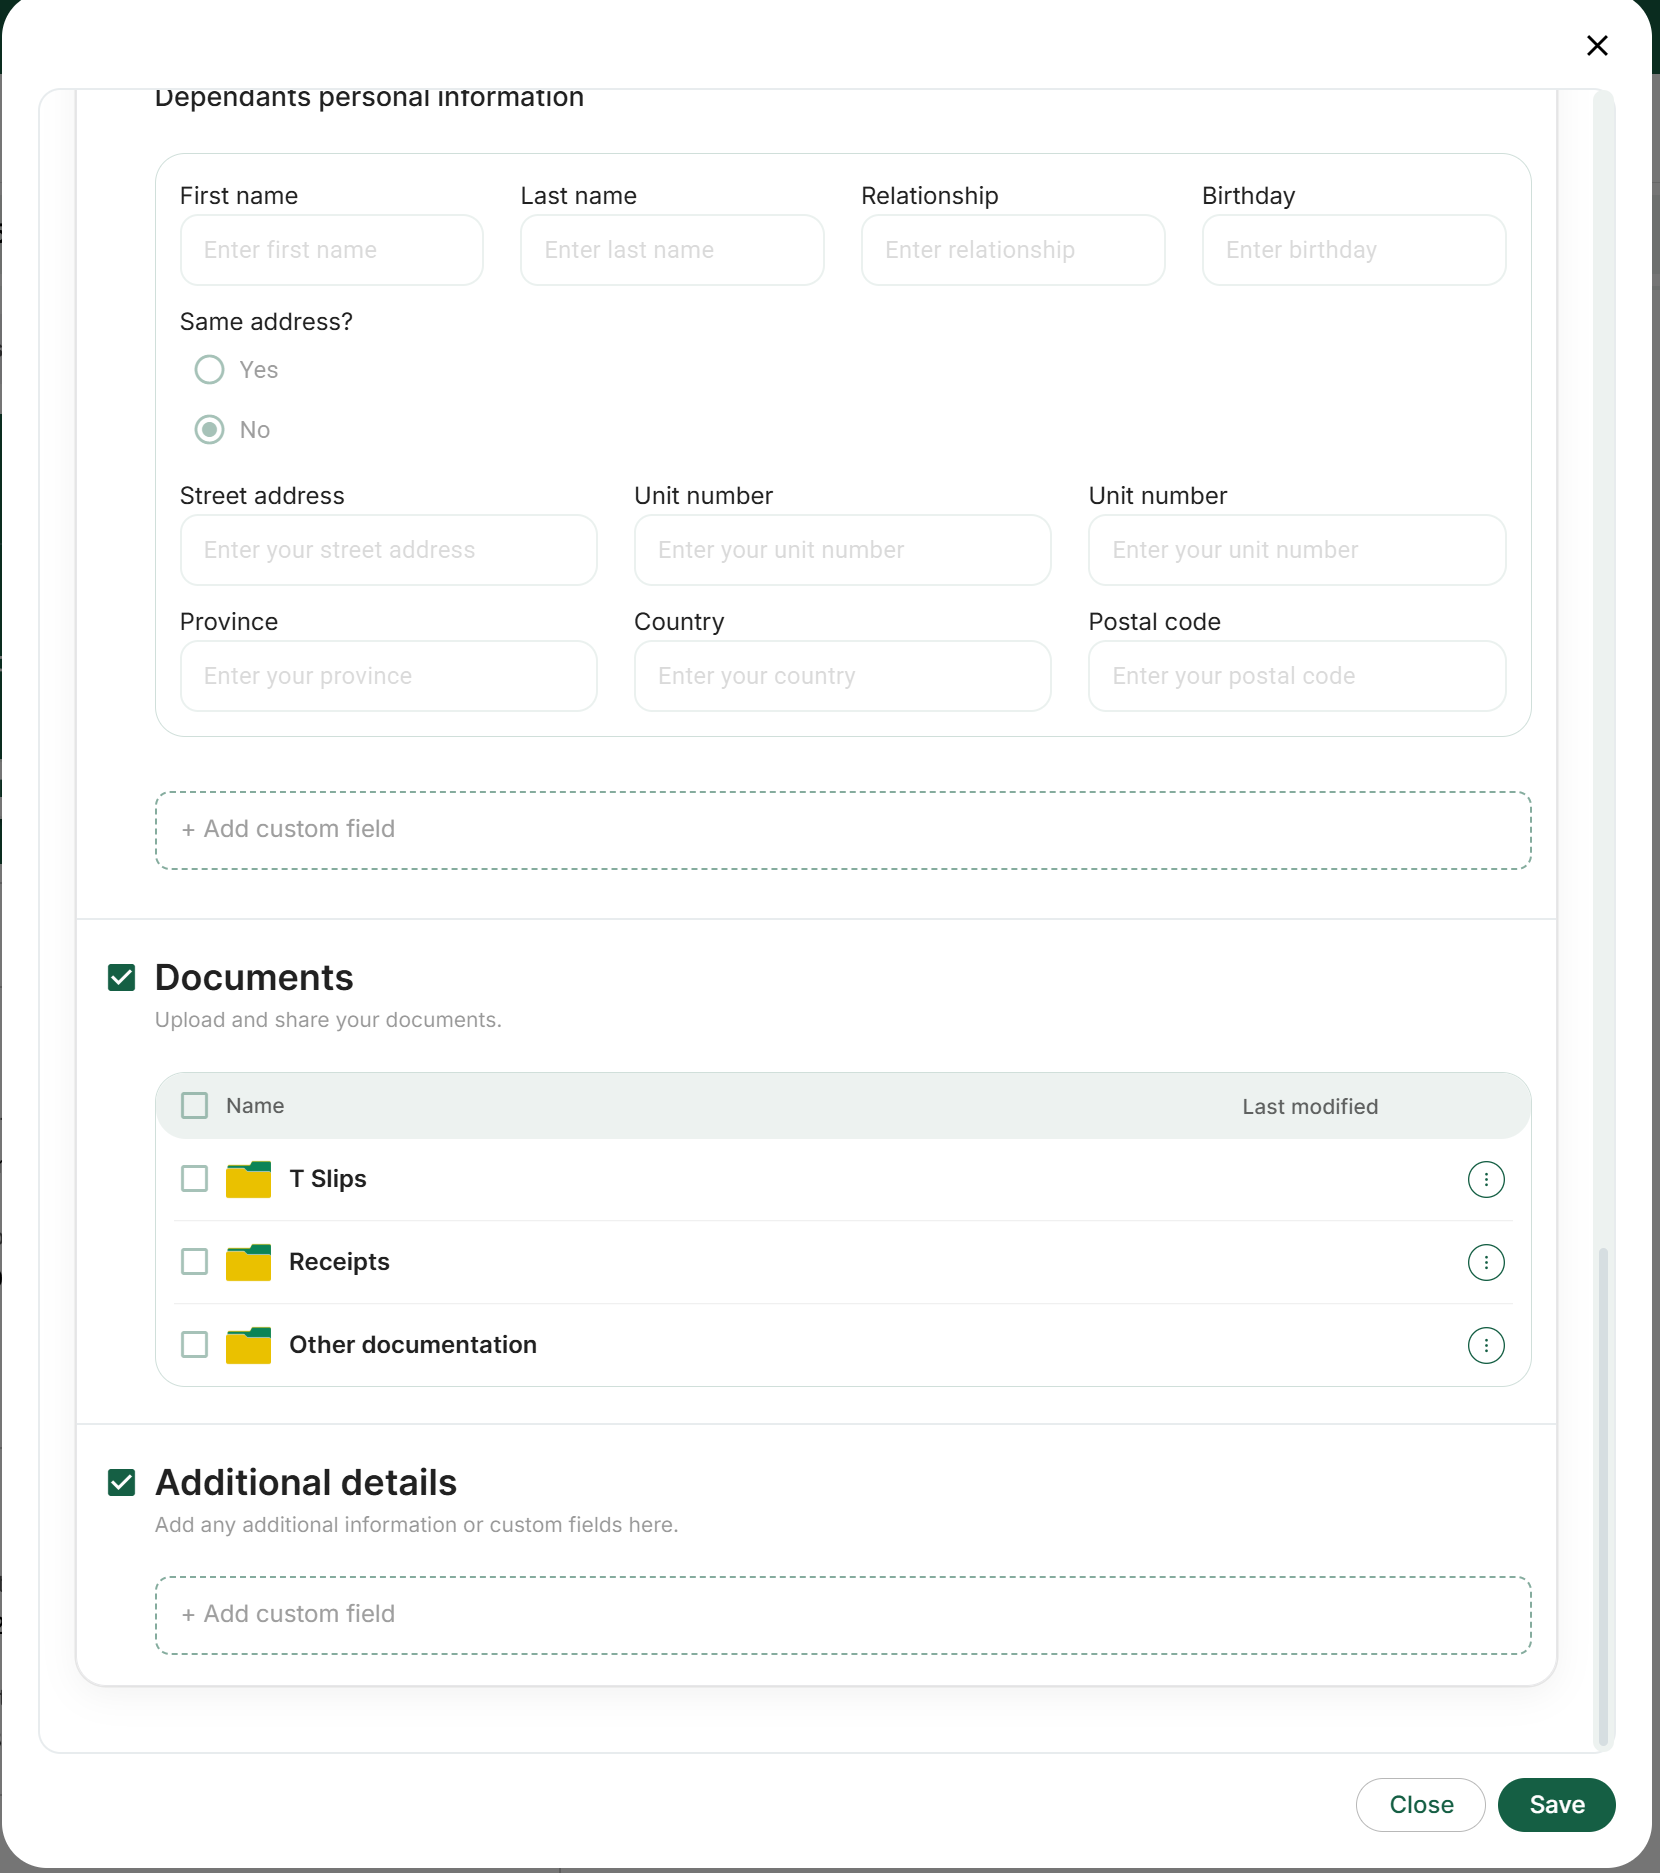
Dependants
Children or supported persons (name, relationship, DOB, address).
Documents
Guided upload areas to submit documents.
Additional details
Custom questions for edge cases you want to capture.
Adding & Customizing Fields in Templates
Inside a template section, click
+ Add custom field and choose a field type:
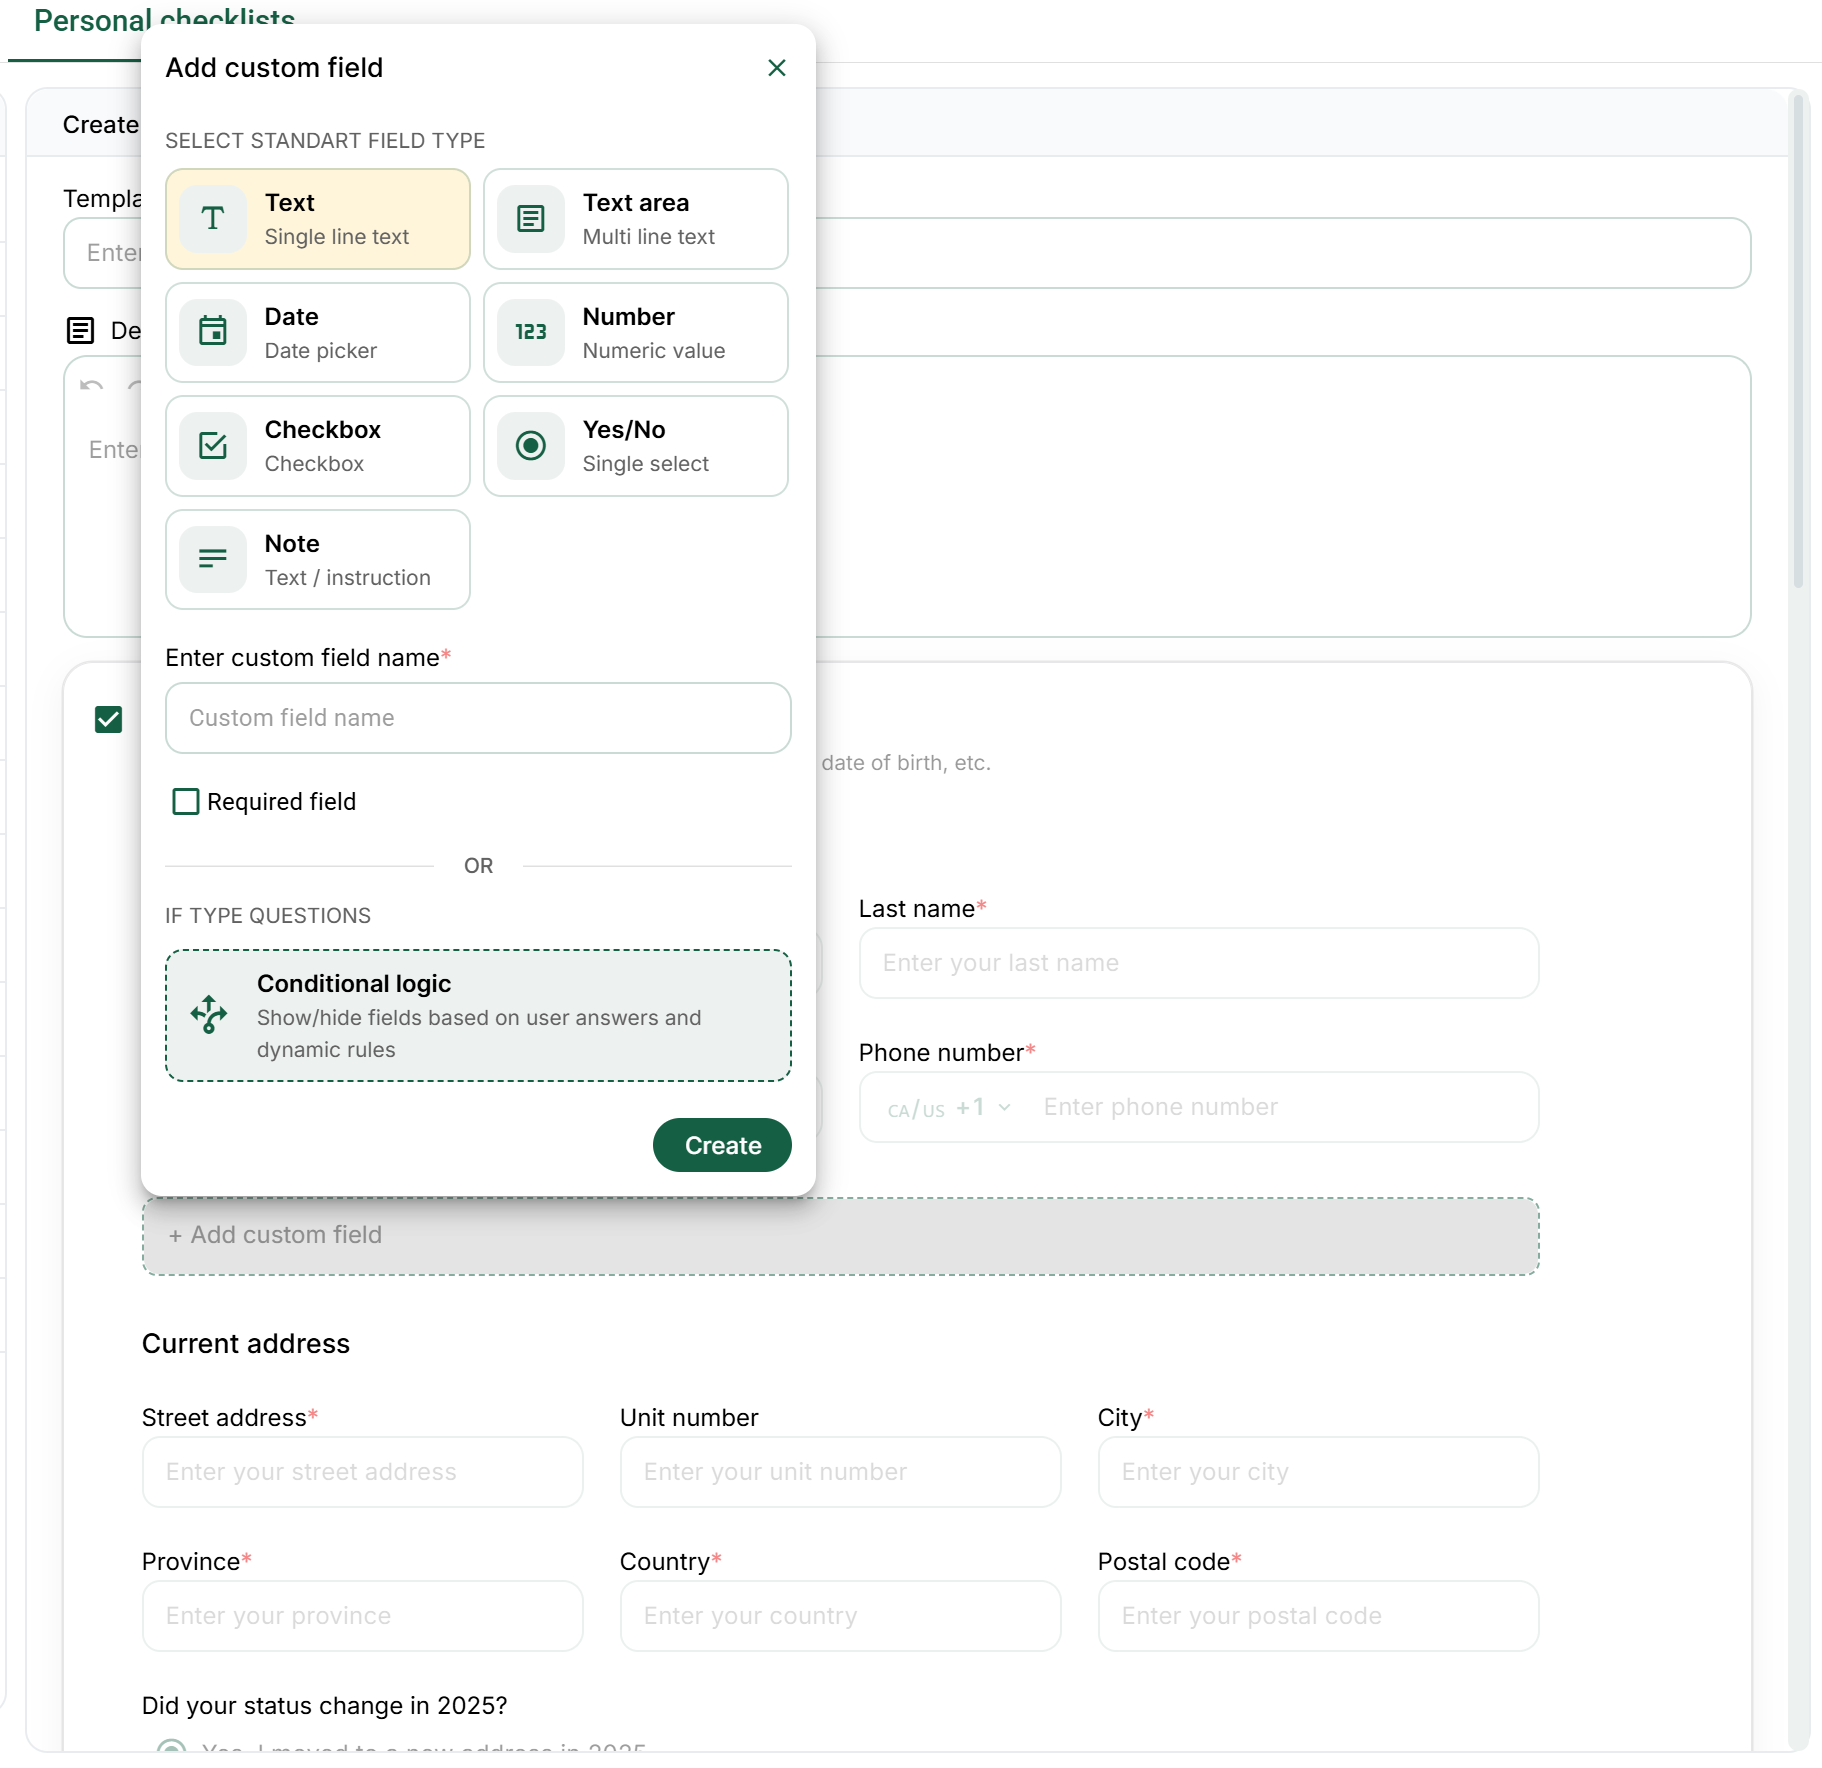
Text
Text area
Date
Number
Checkbox
Yes/No
Condition logic
Note
Then configure
- Custom field name (required)
- Is field required? (checkbox)
Mark fields “required” only when you truly need them for every filer. Too
many required fields reduces completion rates.
Conditional Logic – Make Checklists Smarter & Shorter
Conditional logic lets your checklist adapt in real time based on what the
client answers. Instead of showing every possible question to everyone, the
form only displays relevant follow-up fields, sections, or stop messages when
certain conditions are met.
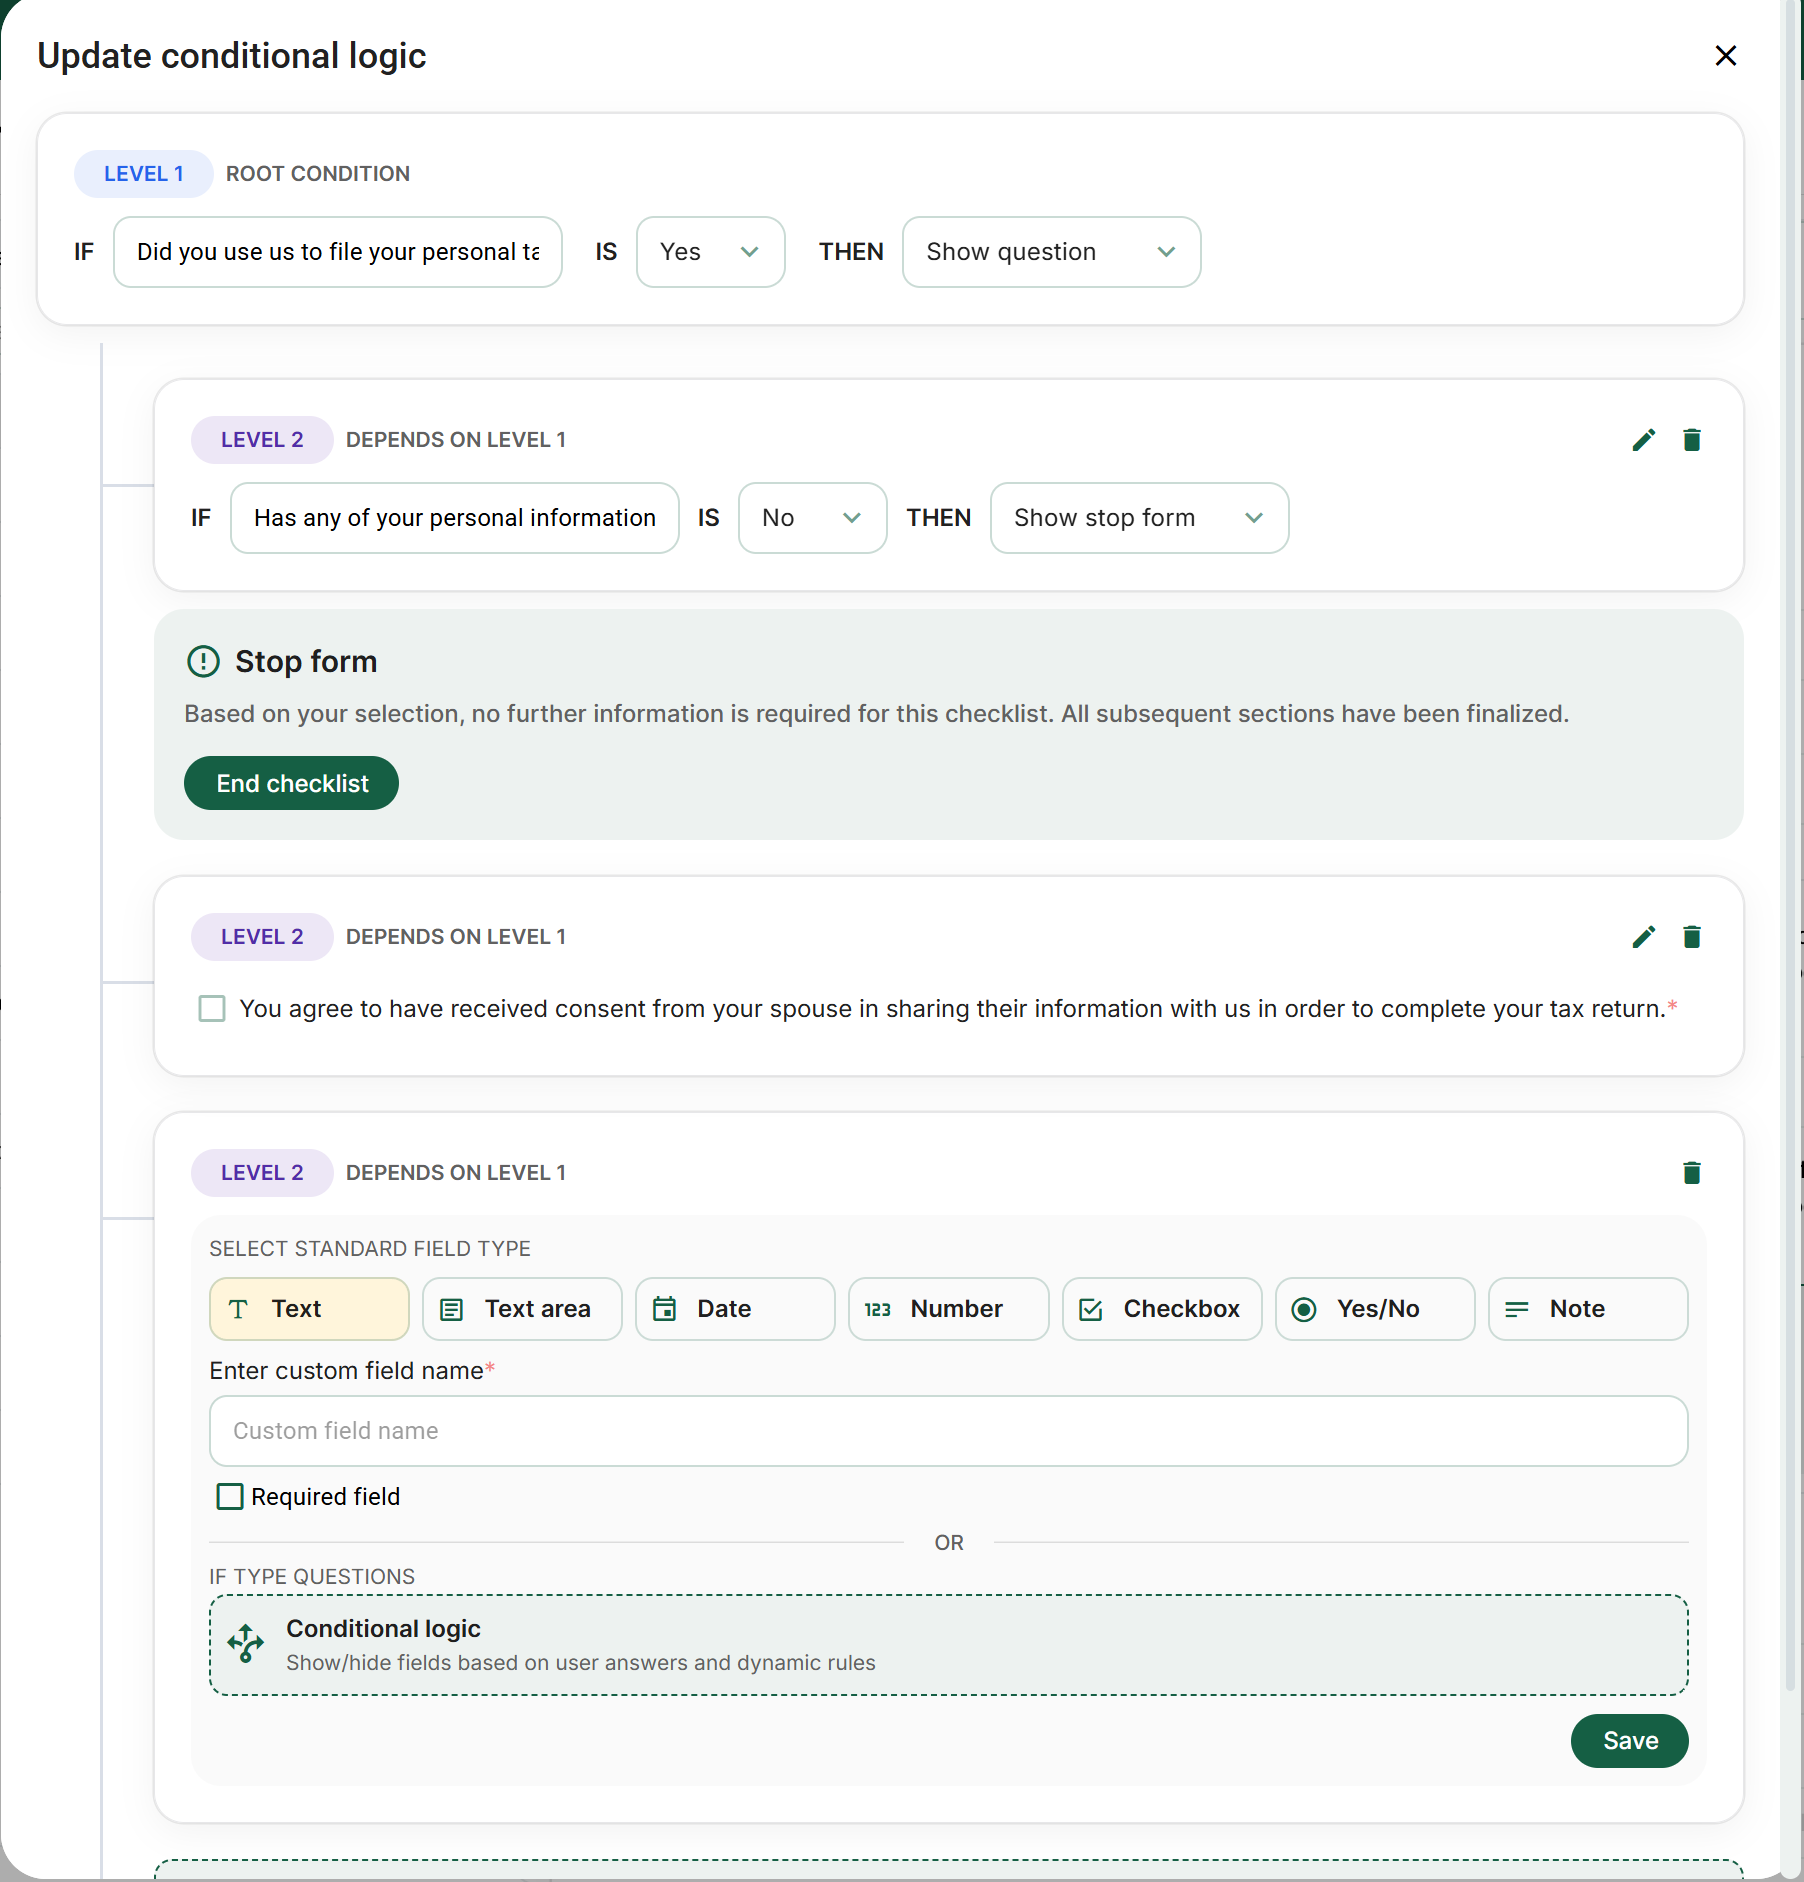
How conditional logic works
It follows simple “IF → THEN” rules:
- IF = the condition (e.g. answer to a previous Yes/No or dropdown question)
- THEN = the action (most common: Show / Hide a field, section, or even stop the form early)
You can create rules at different levels:
- Root-level (top of the checklist)
- Nested / dependent levels (rules that only apply if a parent condition is true)
Tax checklist examples
-
IF “Did you use us to file your personal tax return last
year?” IS Yes
THEN Show the next question about updates this year -
IF “Has any of your personal information changed?”
IS No
THEN Show a stop message and end the checklist early (no further info needed) -
IF “Marital status” = Married or Common-law
THEN Show spouse consent checkbox + spouse information fields
Benefits: shorter forms, higher completion rates, less client frustration,
and cleaner data for you (only relevant answers are collected).
Look for the Conditional logic toggle or button when editing
fields or sections — it lets you build these dynamic rules visually.
Where to manage Personal Checklist templates
Go to: Templates (nav bar) → Personal Checklists
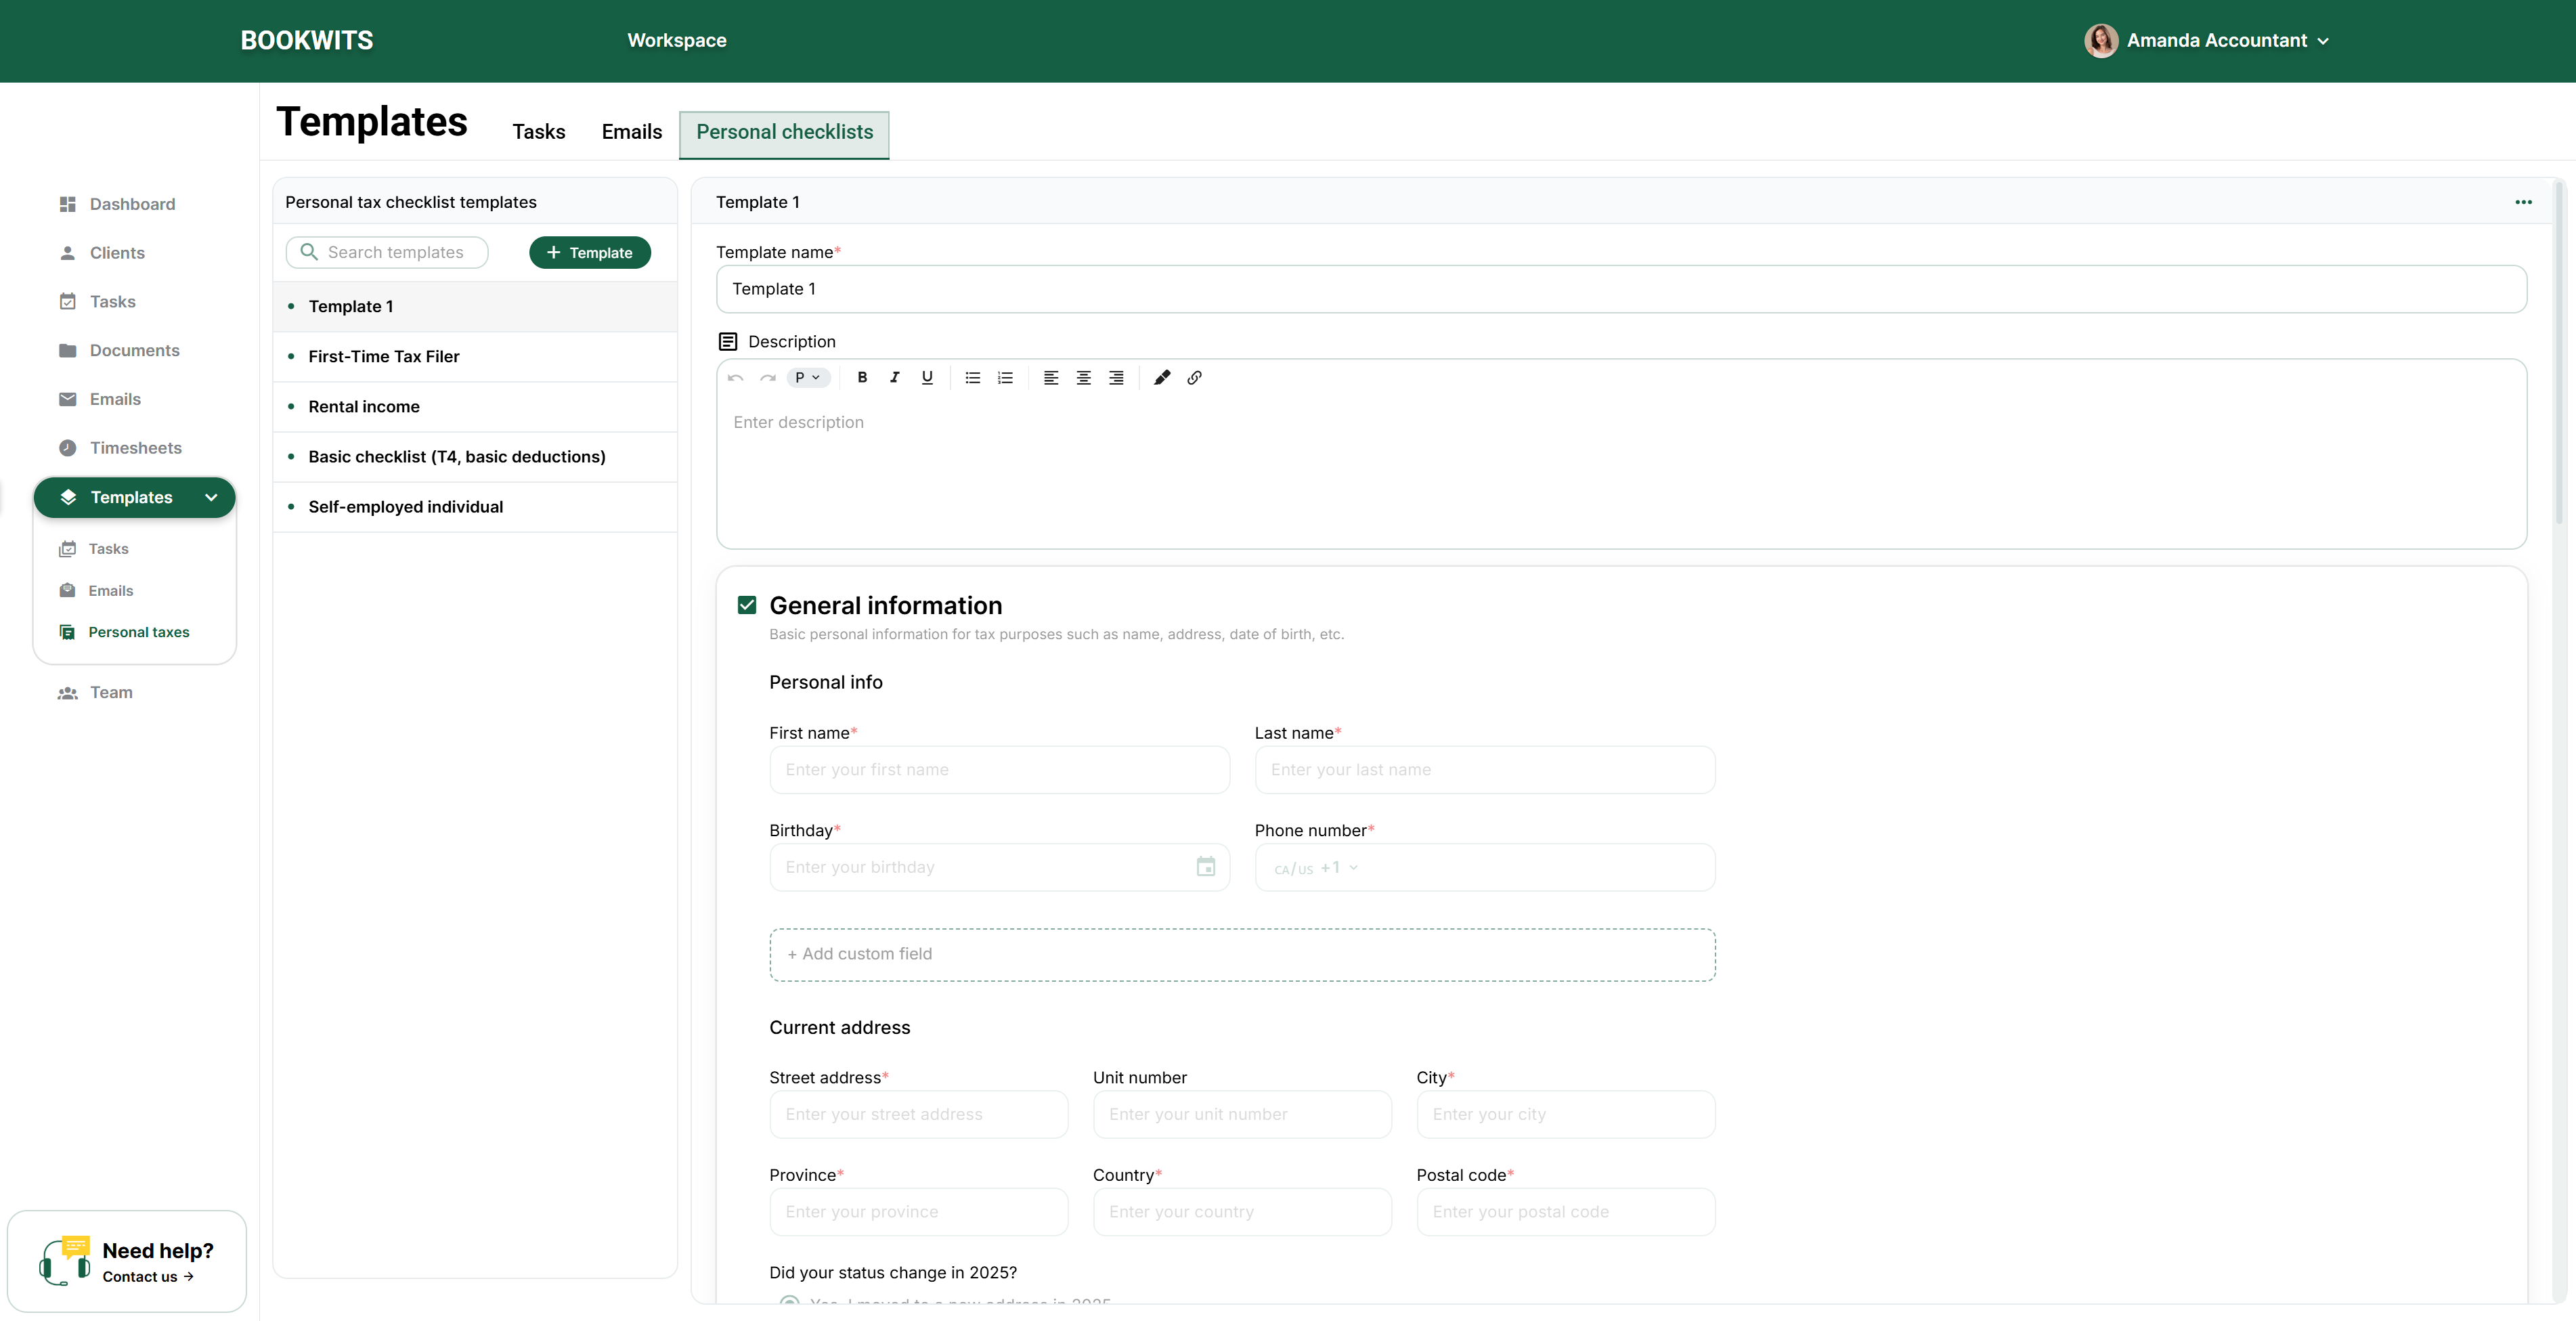
From there you can
- Create new personal checklist templates
- Update existing templates
- Delete templates you no longer use
This is your reusable “intake library.”
What happens when the client completes the checklist
1
You get an email notification
Once submitted, you’ll receive an email letting you know it’s done.
2
You can view the completed checklist in the client profile
Client → Personal Taxes → Year (e.g., 2025) → Checklists. Answers are
displayed clearly by section.
3
Uploaded documents are saved into folders automatically
Uploads are organized into standard folders like:
T Slips
Receipts
Other documentation
This keeps tax-season uploads structured without manually sorting email
attachments.
Multiple checklists per client (family members / multiple filers)
You can send multiple checklists for one client—useful when you need separate
submissions for spouse/family members.
Result structure
One client → one tax year (2025) → multiple checklist submissions (one per
person).
Use separate checklists when different people have different income types
(e.g., one self-employed, one basic T4).
Best practices (what to do first)
If you’re setting this up for the first time
- Create 3–5 templates: Basic T4, First-time filer, Rental income, Self-employed, Family/spouse variant
- Add only the custom fields you actually use for decisions
- Preview every template before sending (eye icon)
- Send checklists early in tax season and use Tasks to follow up on non-responders
Keep required fields minimal. Completion rate matters more than “perfect
intake” on the first pass.
Want help designing your intake templates?
Book a demo and we’ll help you build 3–5 checklists that match your firm’s
process, keep completion rates high, and route uploads into clean tax-season
folders.