Back to Resources
Video Walkthrough (Documents Module)
If you have a walkthrough video, drop it here. This is ideal for showing folder
sharing, portal access, and move/copy.
 Coming soon...

HOW TO USE BOOKWITS
DOCUMENTS
BEGINNER
Documents Module Guide
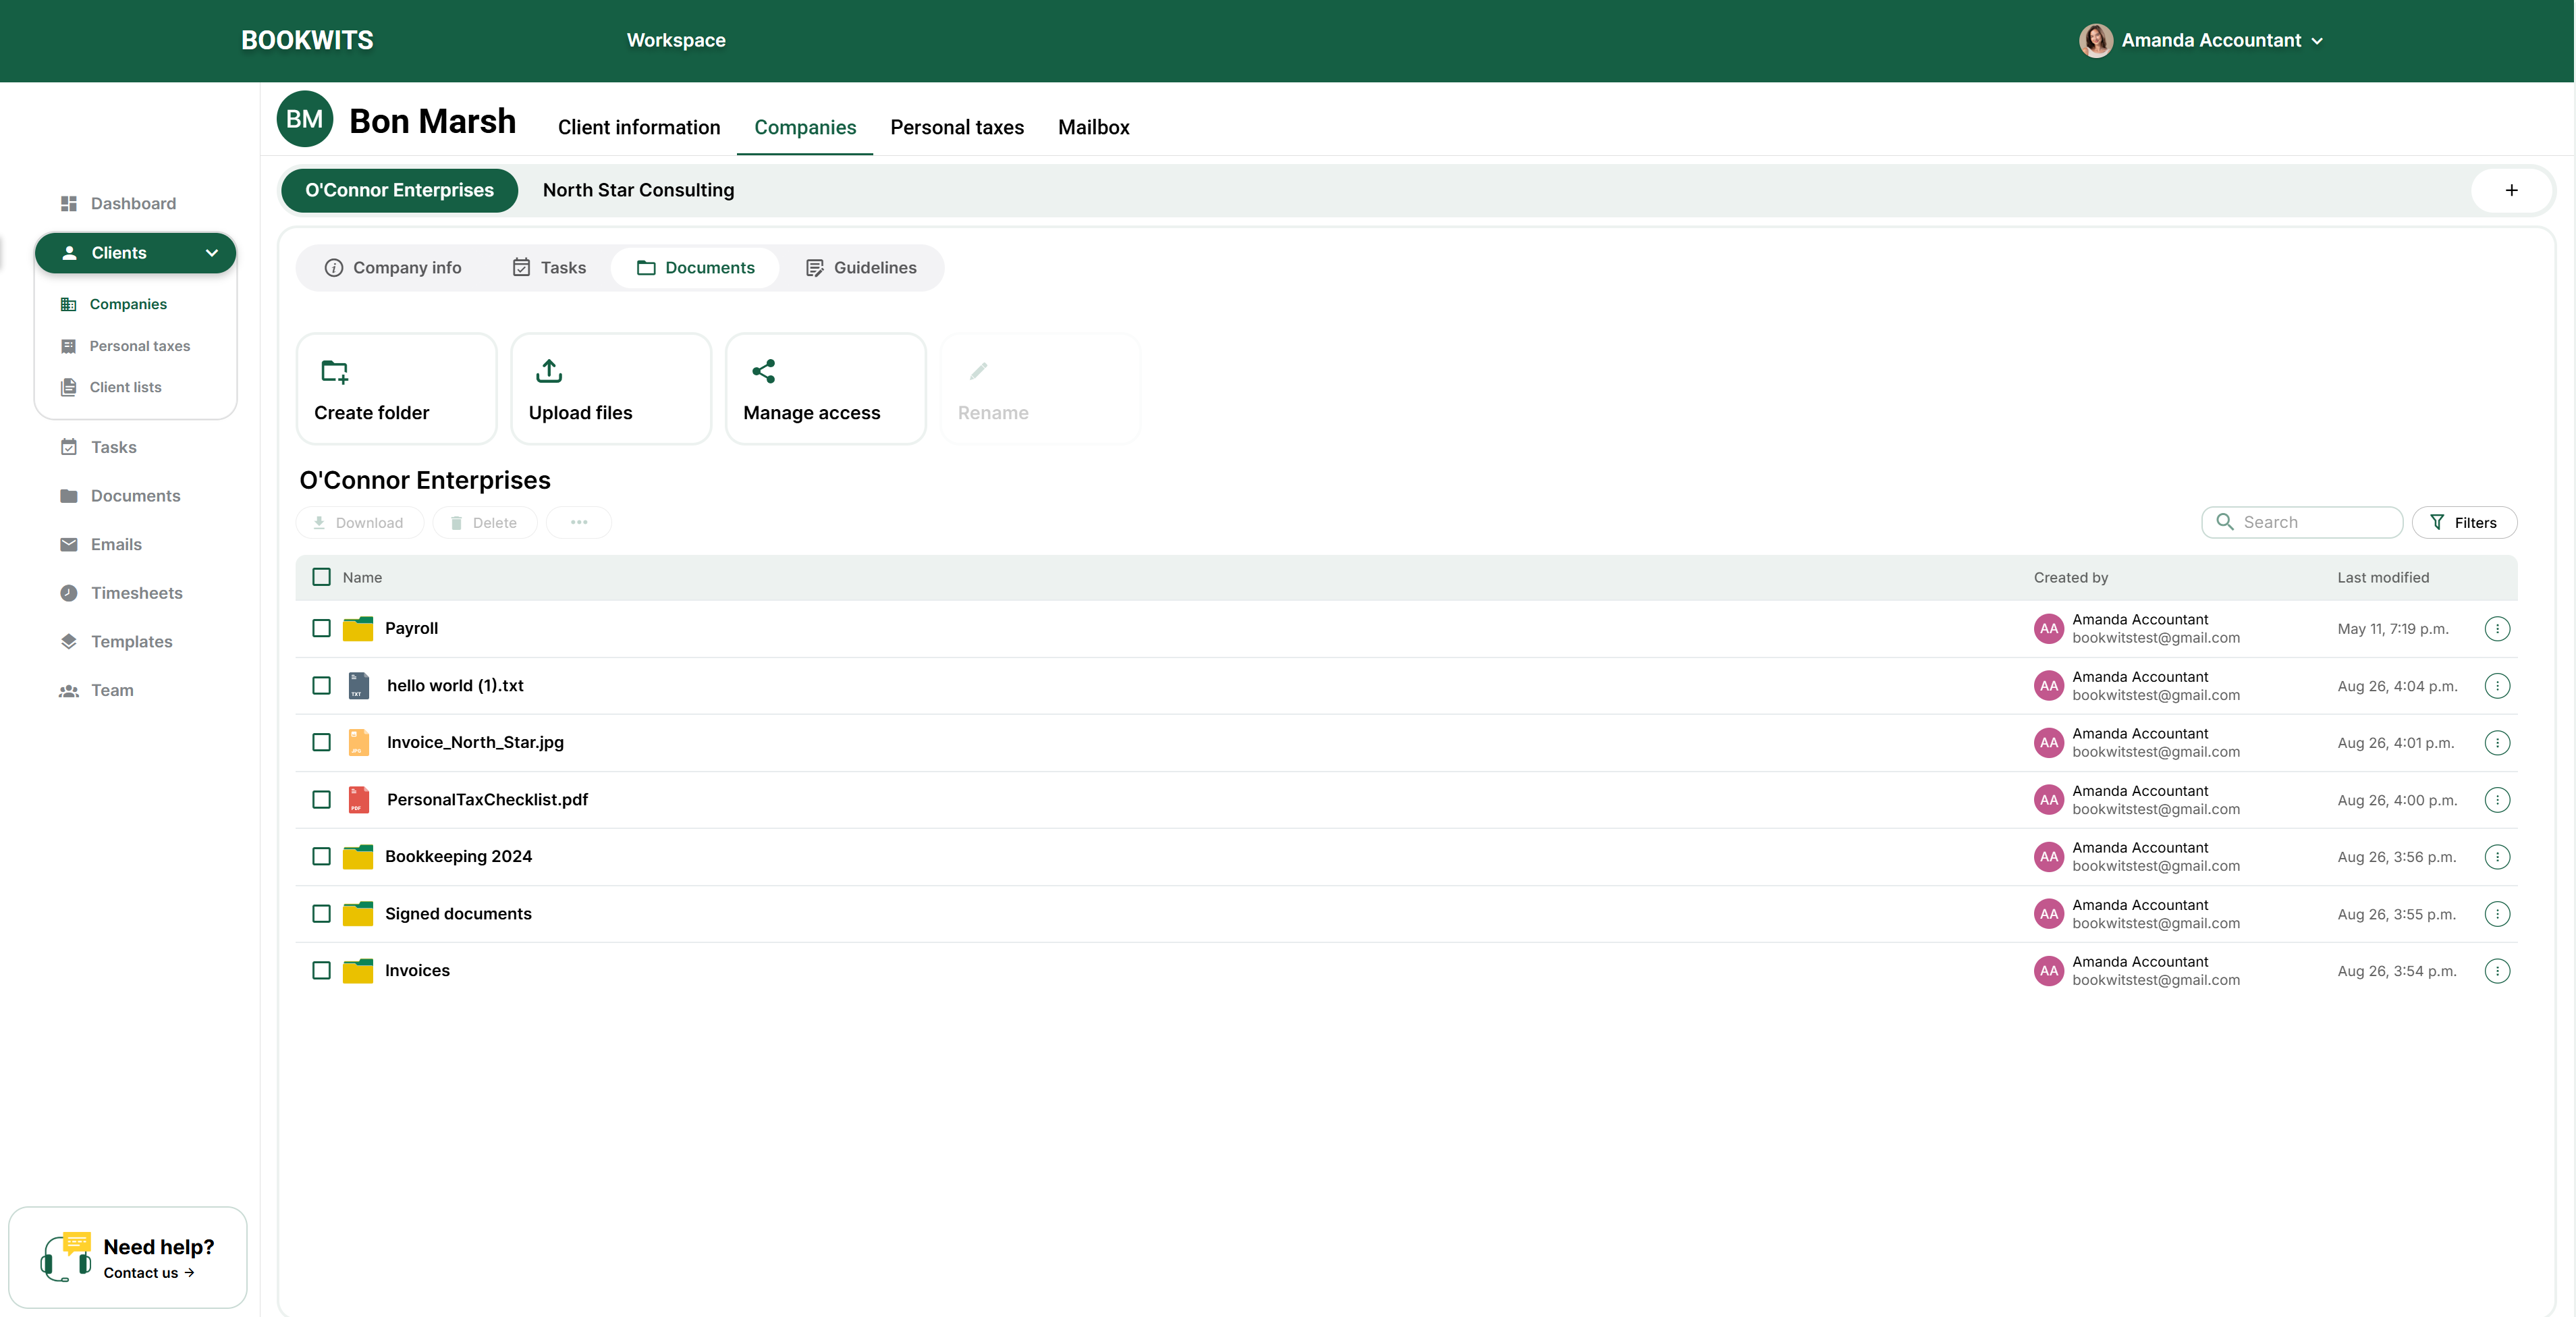
The Documents module is where you store, organize, and share client files in a clean folder structure—so documents don’t live across email threads, desktop folders, and scattered links.
How to Use Bookwits
9 min read
What “Documents” is for (plain English)
Use Documents to:
- Keep all client files in one secure place
- Share folders with clients through the client portal
- Control what clients can access (and what they can’t)
- Avoid “please resend that PDF” and “where do I upload this?” loops
In Bookwits, documents are typically organized around
Companies (entity work) and
Personal Tax Years (T1 work by year).
Folder creation in Bookwits (Automatic + Manual)
Automatic folders
Folders are created automatically when you:
- Add a Company
- Open a new Personal Tax Year
Manual folders
You can also create folders manually any time to match your firm’s process.
Common manual folder examples
Client Uploads
Engagement / Admin
Workpapers
Filed / Final
CRA / NOA
Payroll / T4s
Use the same folder structure across clients so
staff (and clients) always know where to place files.
Uploading documents (basic workflow)
- Navigate to the right client context (Company or Personal Tax Year).
- Upload files into the correct folder/subfolder.
- Use consistent filenames (so you can find files fast later).
Example naming
2025_T4_Sarah_Thompson.pdf
2025_Interest_T5_Sarah_Thompson.pdf
2025_Corp_YearEnd_Workpapers.pdf
Naming is “searchability.” If filenames are consistent, you’ll find
documents in seconds.
Share a folder with your client (Client Portal access)
Sharing gives your client portal access to the folder(s) you choose.
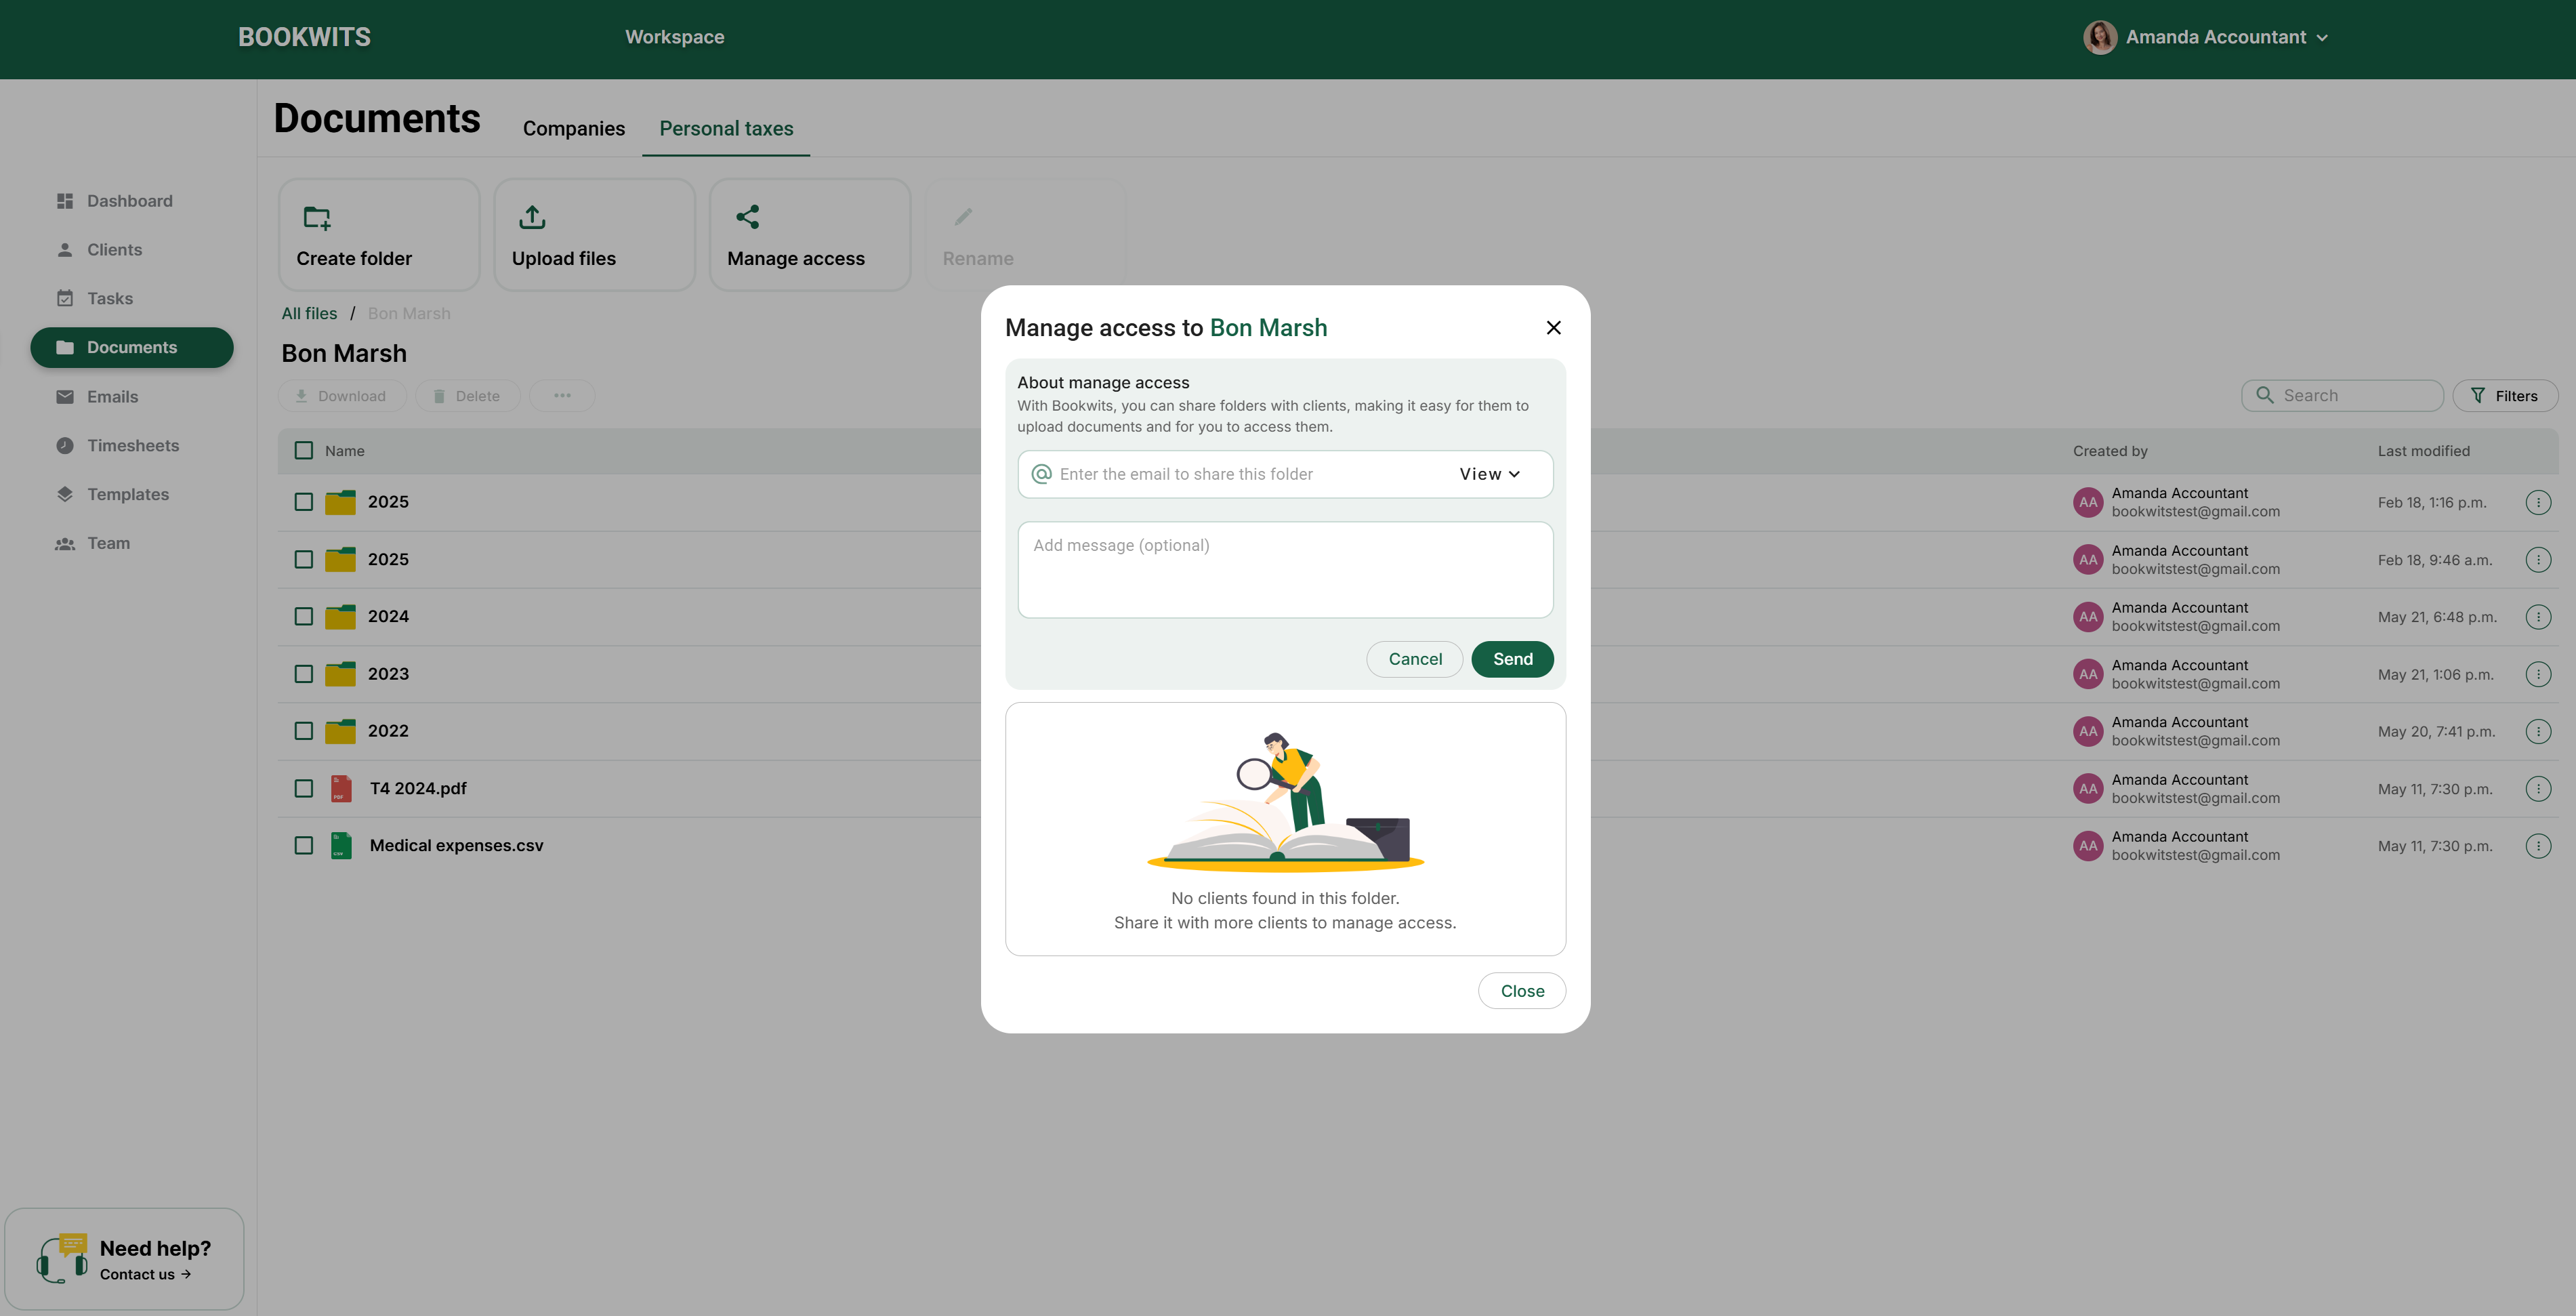
Steps
- Open the folder you want to share.
- Click Manage Access.
- Enter your client’s email.
- Choose the role: View (read-only) or Admin (higher access level based on what you allow).
- Send the invite.
What happens next (important for beginners)
- The client receives an email invitation.
- They must register (create their portal account) before accessing shared folders.
- They’ll see a folder-style view limited to only what you shared.
Share only specific files or subfolders
You don’t have to share everything. You can share only a specific subfolder
(e.g., “Client Uploads”) or only specific files (e.g., engagement letter).
Start restrictive (only what the client needs), then expand access if
required.
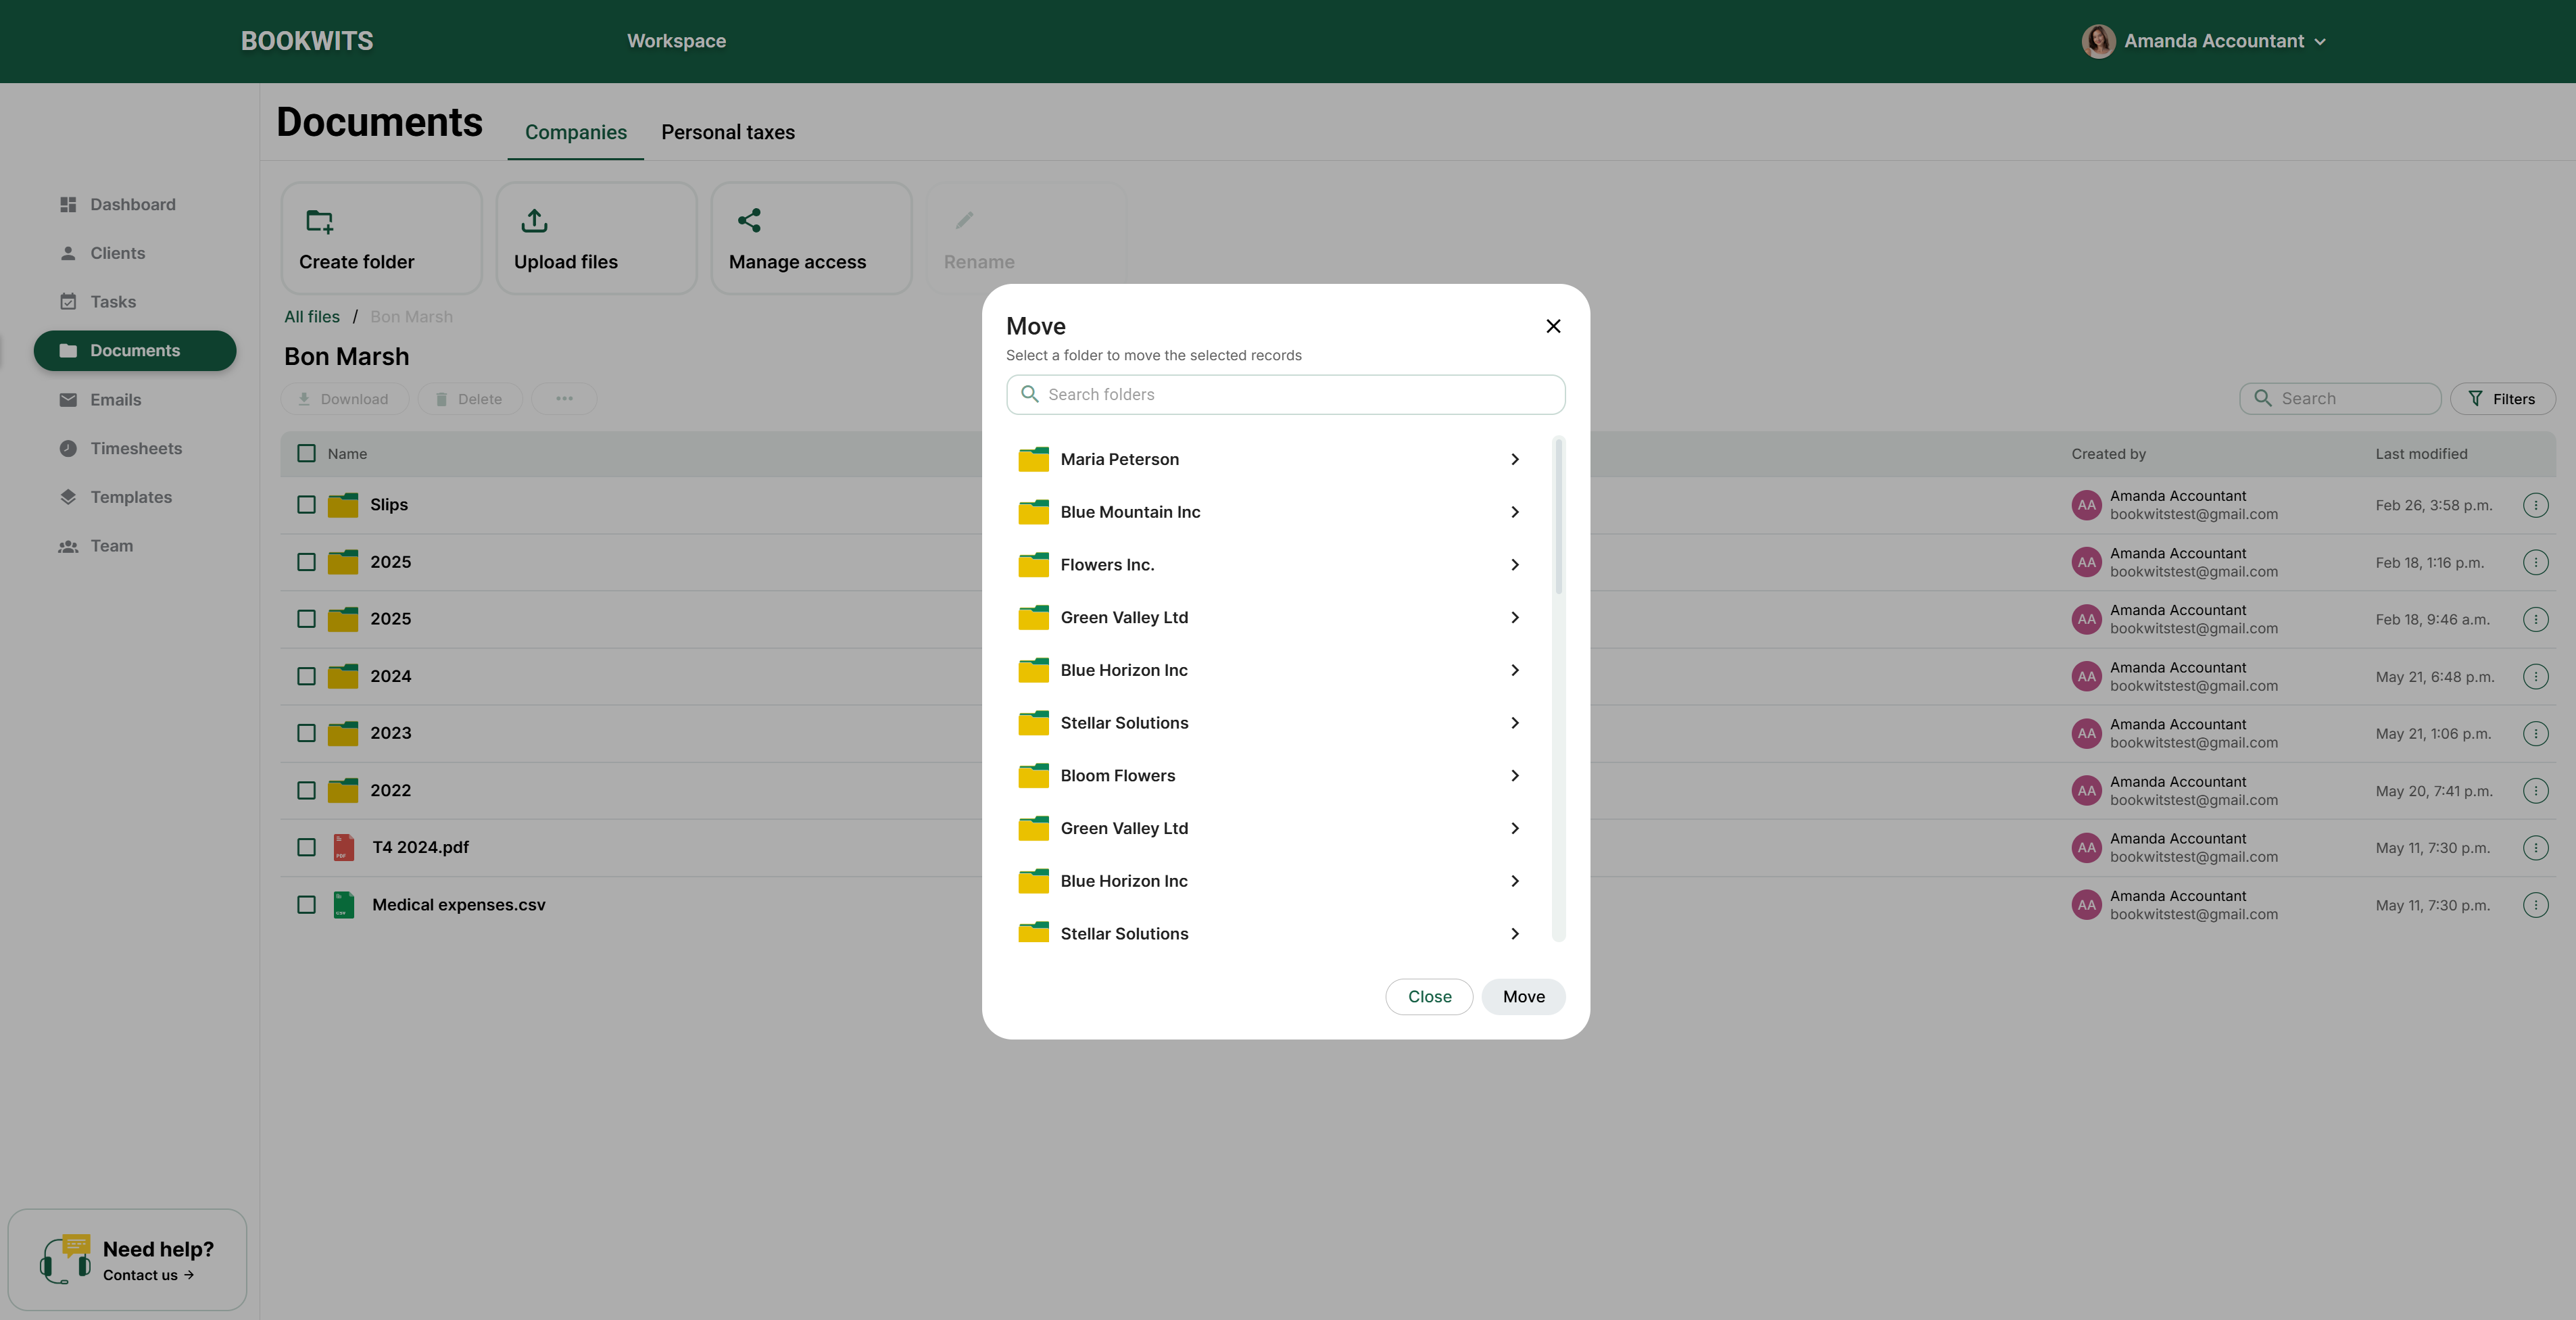
Copy and Move folders/files (organize without re-uploading)
Move
Use Move when something was uploaded to the wrong place and should live
somewhere else.
- “Client Uploads” → “Workpapers”
- “Receipts” → “Filed / Final”
Copy
Use Copy when the same file belongs in multiple places.
- Finalized PDF needed under both “Filed / Final” and “Year-End Support”
A clean folder structure reduces follow-up and makes task handoffs easier.
Preview a file without downloading
You can view document contents without downloading:
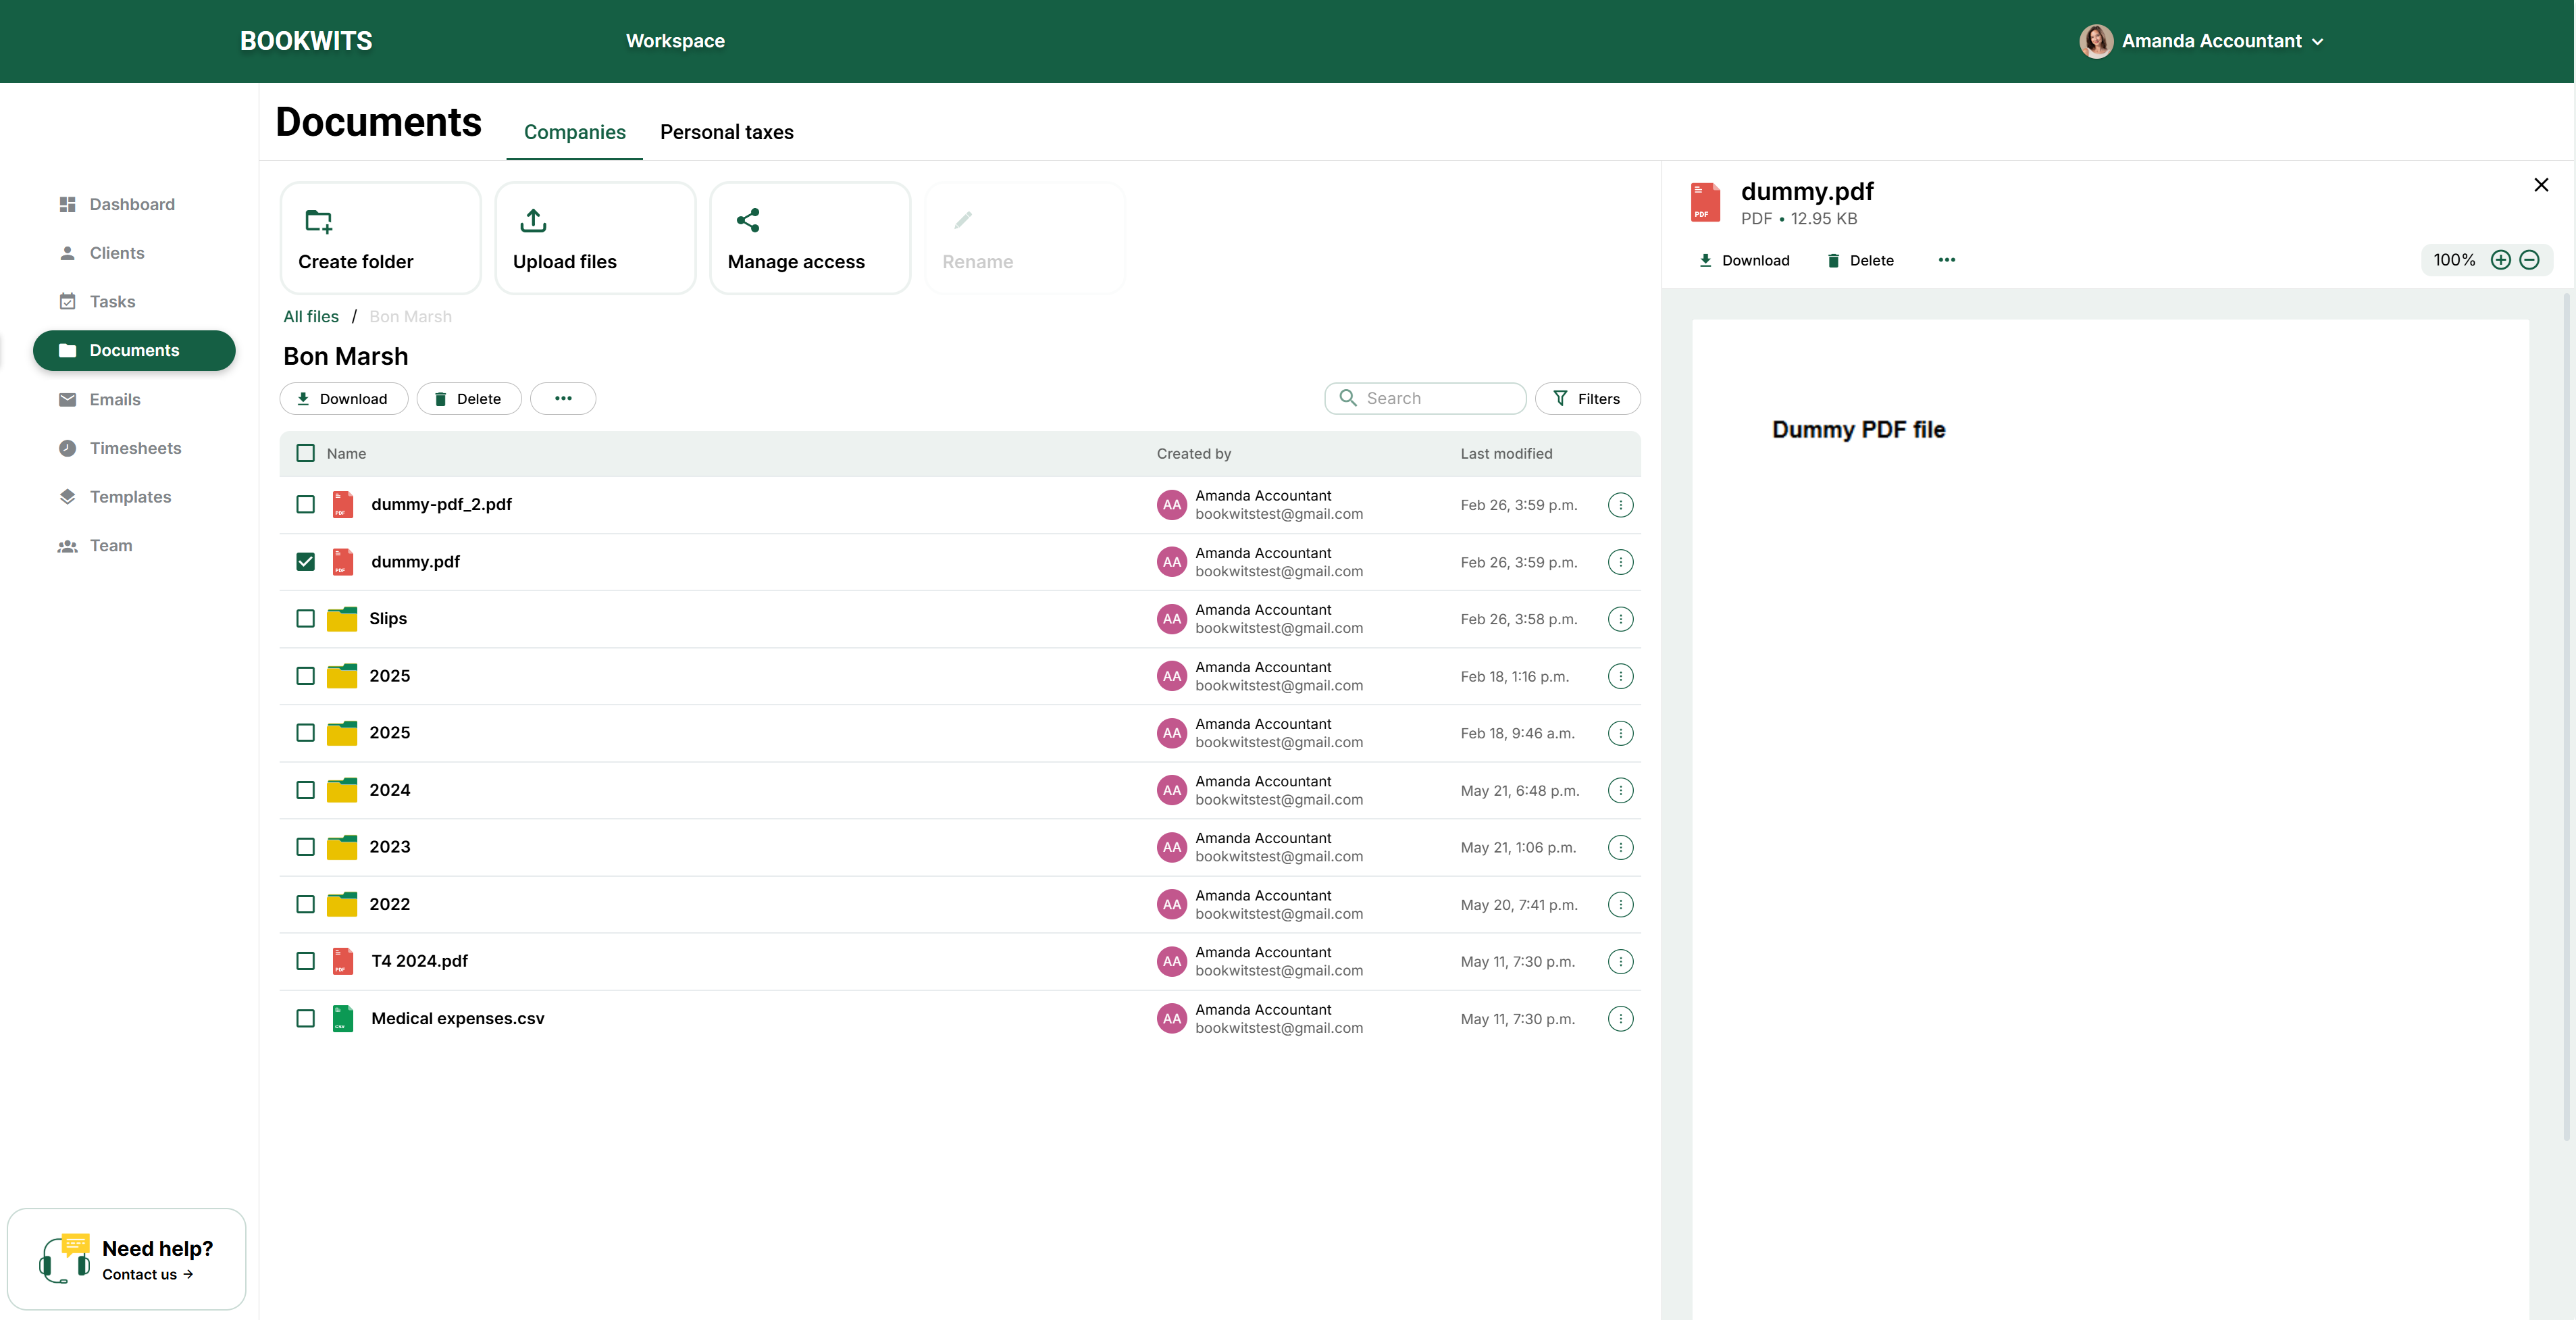
- Click the file name
- A preview panel opens (typically on the left)
Great for quickly confirming
- “Is this the right slip?”
- “Is this the signed version?”
- “Does the date match the tax year?”
Documents from inside a Client Profile
You can access documents directly from the Client profile, filtered to exactly
what you’re working on.
Company documents view
Shows folders/files only for the selected company/entity.
Personal Tax Year documents view
Shows folders/files only for the selected tax year.
Personal Tax Checklist creates extra folders automatically
When you use the Client Files Personal Tax Checklist, Bookwits creates
folders like:
Other Documentation
Receipts
T-Slips
You don’t need to search the entire Documents module—Bookwits narrows it to
the company or tax year you’re currently in.
Security and storage (Azure + encryption)
Files are stored securely in the cloud using Microsoft Azure, and are
encrypted.
What this means for clients
- Their files aren’t sitting on someone’s desktop
- Access is controlled through folder permissions/roles
- Sharing happens through the portal instead of email attachments
Best-practice setup (simple and effective)
If you want a starting point that works for most firms, use this structure and
keep it consistent.
For each Company
- Client Uploads
- Workpapers
- Filed / Final
For each Personal Tax Year
- T-Slips
- Receipts
- Other Documentation
- Filed / Final
Consistency = speed. Your team will move faster with fewer mistakes and
fewer client follow-ups.
Want help setting up your Documents structure?
Book a demo and we’ll help you standardize your folder structure, set portal
access rules, and build a clean “client uploads → workpapers → final” flow.